
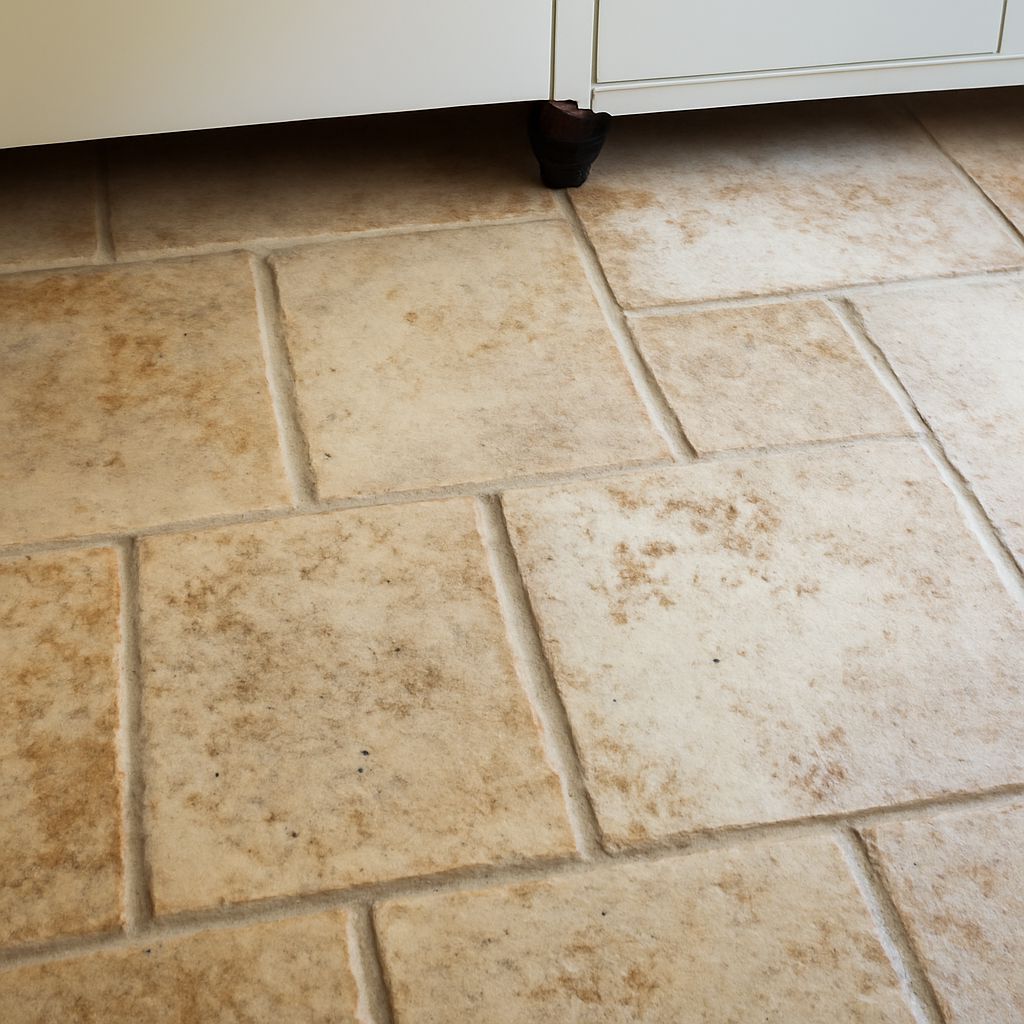
Safe travertine tile cleaning starts with dry grit removal, a pH-neutral cleaner, limited water, and immediate drying. Work in small floor sections so soil does not spread, cleaner does not dry on the stone, and moisture does not sit in pores or grout joints.
Before cleaning, identify the finish and check the sealer. Honed and polished travertine respond differently to traffic, residue, and abrasion. The process below covers routine maintenance, grout cleaning, stubborn soil, and the tests that separate a cleaning problem from permanent stone damage.
Travertine Tile Cleaning: Inspect the Finish and Sealer First
Compare Honed and Polished Stone; Check Filled Holes
Honed travertine has a smooth, matte surface with little or no shine. Its open-looking texture can show dust, footprints, and darkened grout more readily. Polished travertine has a reflective finish created by refining the surface. It shows dull patches, fine scratches, and residue more clearly than honed stone.
Many travertine tiles contain natural holes and voids that have been filled with cementitious or resin-based filler. Check for loose filler, open holes, cracked areas, and chipped edges before wet cleaning. Do not flood these areas or force a brush into damaged openings. Remove loose debris gently, then plan repairs separately if water or soil can enter beneath the tile.
Test Sealer Condition with a Water Drop
Place a few drops of clean water on an inconspicuous area and leave them for 10 to 15 minutes. Blot the water without rubbing, then compare the spot with the surrounding stone. If the stone darkens quickly, the sealer may be worn or absent. If the water remains beaded and the color stays consistent, the surface has better protection.
This test is only a screening step. Sealer does not make travertine stain-proof, and it does not prevent acid etching or scratching. Do not apply more sealer over residue, damp stone, or a failing coating. Clean, rinse if needed, and dry the floor completely before deciding whether resealing is appropriate.
Cleaning Travertine Floors: Grit, Water, and Drying
Vacuum Dry Grit with a Soft Floor Head
Remove sand, soil, and loose particles before adding water. Use a vacuum with a clean, soft floor head rather than a bare plastic or metal attachment. Move slowly along tile edges and grout lines, where grit collects. A soft head reduces the risk of dragging abrasive particles across polished stone.
For large floors, vacuum in one direction and then make a second pass across the first direction. Use a soft, dry microfiber dust mop for light daily soil. Shake or wash the mop away from the floor so collected grit does not return to the travertine.
Use Label Dilution and Limited Water
Choose a cleaner labeled for natural stone and mix it at the manufacturer’s stated dilution. A neutral cleaner is the safest routine choice because travertine contains calcite and can react with acids. Do not substitute vinegar, lemon juice, bathroom descaler, acidic grout cleaner, or other low-pH products.
More cleaner is not better. An overly strong solution can leave a sticky film that attracts soil. Mix only the amount needed for the work session, and replace dirty solution rather than continuing to spread it. Keep water controlled around filled holes, thresholds, baseboards, and grout that already appears damp or soft.
Mop Small Sections with a pH-Neutral Cleaner
- Divide the floor into sections of roughly 10 to 25 square feet, depending on how quickly the surface dries.
- Dip a clean microfiber mop into the diluted neutral cleaner and wring it until damp, not dripping.
- Mop one section using overlapping passes. Work from the farthest area toward the exit.
- Lift sticky soil with repeated gentle passes instead of pressing harder or using an abrasive pad.
- Rinse the mop frequently and change the solution when it becomes visibly dirty.
Keep the solution on the floor only long enough to loosen soil. If it begins drying before the section is clean, reduce the section size and use a less saturated mop. Standing water can move soil into grout joints, darken porous stone, and seep into openings around filled holes.
Rinse Only for Residue, Then Dry Immediately
A clean-water rinse is useful when the floor feels tacky, looks cloudy, or has visible cleaner residue. It is not automatically required after every neutral-cleaner pass. Make a clean-rinse decision based on the product label and the floor’s condition.
For a rinse, use a separate microfiber mop dampened with clean water. Do not flood the surface or repeatedly wet the same area. Follow immediately with a dry microfiber mop, clean towels, or an air mover. The finished floor should feel clean rather than slippery and should have no visible water film. Dry grout lines, tile edges, and low spots first because they hold moisture longest.
Cleaning Travertine: Grout and Stubborn Soil
Clean Grout with Soft Brushes
After vacuuming, apply diluted neutral cleaner to a small grout area. Agitate with a soft nylon grout brush or soft toothbrush, using short strokes along the joint. Avoid stiff wire brushes, abrasive powders, and aggressive scrubbing that can remove grout or scratch polished tile edges.
Lift the loosened soil with a microfiber cloth or damp mop. For dark grout, work in short sections so the dirty solution does not dry on adjacent travertine. Rinse the brush often. If the grout remains discolored after soil removal, the color may be absorbed, the grout may be deteriorated, or the sealer may have failed. Do not compensate with a stronger or acidic chemical.
Treat Stubborn Soil Without Abrasion
First soften stubborn soil with a small amount of diluted neutral cleaner. Allow brief contact while keeping the area wet, then agitate with a soft brush or white nonabrasive pad. Repeat once or twice rather than increasing pressure or chemical strength.
For waxy residue, furniture polish, adhesive, or construction material, identify the substance before choosing a remover. Some solvents and specialty products can damage sealer, resin-filled holes, or polished finishes. Test any stone-safe product in a hidden area, follow its label, and remove all residue with controlled rinsing and immediate drying.
Identify Stains, Etching, Dull Wear, and Sealer Failure
Separate Removable Soil from Absorbed Stains
Removable soil sits on the surface or in shallow grout texture. It usually transfers to a damp cloth, improves with neutral cleaner, or disappears after gentle brushing. Repeat routine cleaning if the area becomes visibly lighter without changing the stone’s texture or sheen.
An absorbed stain has penetrated the travertine or grout. It may remain after the surface is clean and dry, with a defined dark, oily, rust-colored, or organic-looking mark. Do not keep scrubbing it. Photograph and identify the likely source, then use a poultice or professional stone treatment designed for that stain and finish. Test first because stain-removal products can alter color or sealer.
Tell Acid Etching from Dull Wear and Sealer Failure
Acid etching appears as a pale, cloudy, or rough spot after contact with acidic liquid. The mark can resemble a stain, but it is surface damage rather than soil. Neutral cleaner will remove residue around it but will not restore the lost finish. Honed stone may need local refinishing; polished stone commonly requires professional polishing or honing to blend the area.
Dull wear develops gradually in walkways, near entrances, or beneath furniture movement. It often affects a broad path and may include fine scratches or flattened shine. Compare the worn area with a protected edge or low-traffic section. Cleaning can remove film that exaggerates dullness, but it cannot recreate a worn polish.
Sealer failure is indicated by rapid darkening during the water-drop test, uneven absorption, or stains that enter quickly despite proper cleaning. A sealer cannot repair etching, holes, scratches, or worn stone. Once the floor is clean and fully dry, have the finish assessed before resealing; applying product over trapped moisture or residue can create blotches and a hazy film.