
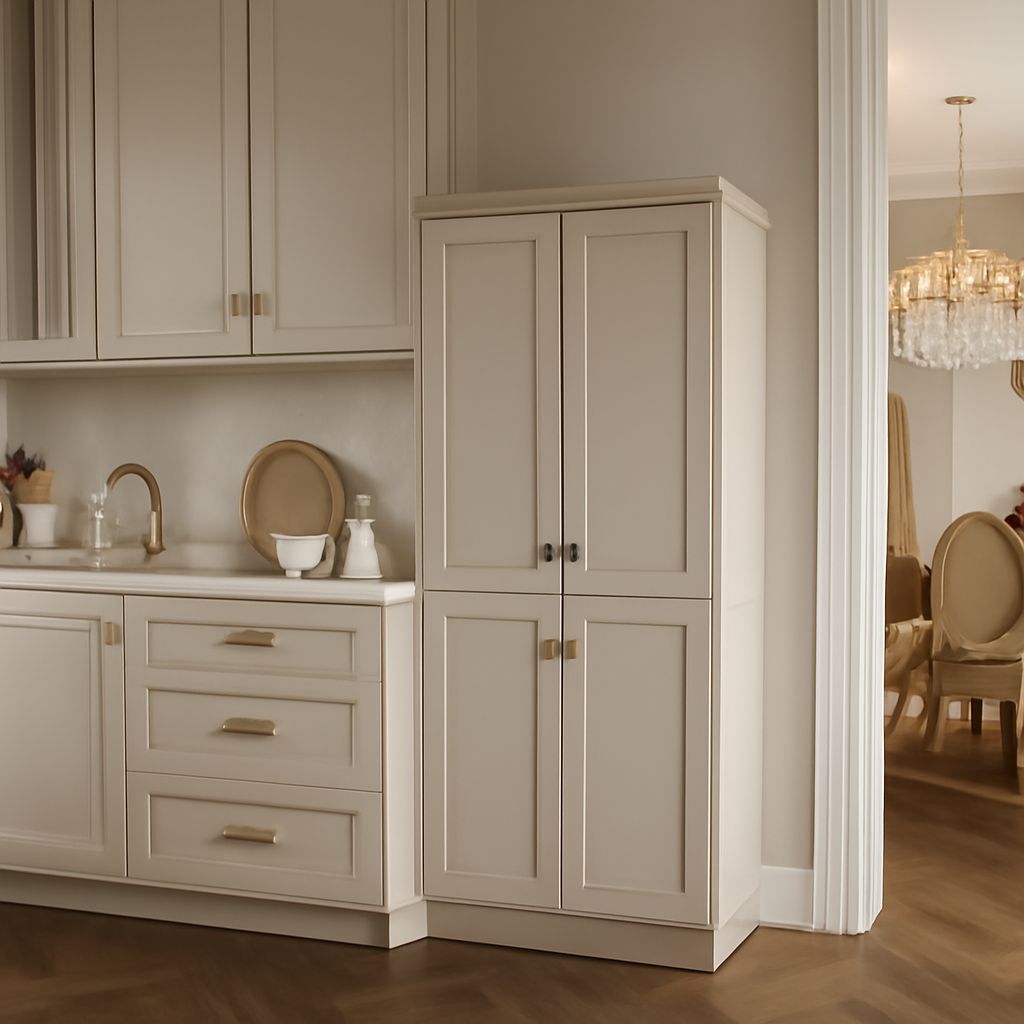
A solid wood pantry cabinet is a strong choice when you want durable storage for dry goods, cookware, and small appliances. Choose one only when the cabinet’s main structure—not just its doors or face frame—uses solid lumber.
Compare construction, usable depth, shelf support, access, ventilation, and installation before buying. A well-planned cabinet keeps food visible, protects appliances, and remains stable as its load changes.
Solid Wood Pantry Cabinet Formats: Solid vs. Mixed Construction
Pantry cabinets usually come in three formats: a tall single cabinet, a double-door cabinet, or a modular unit assembled from several sections. Tall single units suit narrow walls, while wider double-door designs make shelves easier to reach from both sides.
For a genuinely solid wood pantry cabinet, inspect the cabinet sides, top, bottom, shelves, back, and door frames. Solid lumber may be paired with plywood in the back or drawer boxes, but the seller should identify every material clearly. A cabinet is not solid wood if only its doors, trim, or face frame use solid lumber over a manufactured-board box.
Mixed construction is not automatically inferior. A plywood carcass with solid wood doors can offer better dimensional stability, especially in kitchens with seasonal humidity changes. Veneered plywood often resists warping while providing a real-wood appearance. Medium-density fiberboard may produce a smooth painted finish, but it needs careful protection from standing water.
Check how the parts are joined. Dovetail drawer joints, mortise-and-tenon door frames, reinforced corners, and glued dowel or pocket-screw connections are useful indicators of build quality. Stapled joints and thin unsupported panels deserve closer inspection.
- Back: A full back panel adds rigidity and helps prevent racking. Thin backing attached only with a few staples may need wall restraint.
- Hinges: Look for adjustable concealed hinges or substantial exposed hinges rated for the door weight. Soft-close hardware reduces impact on the cabinet.
- Finish: A sealed lacquer, conversion varnish, or durable water-based coating protects against ordinary kitchen spills. Unsealed wood needs more maintenance.
- Stability: Heavy shelves and doors require a square, well-braced box. Ask whether the cabinet includes leveling feet, a plinth, or an anti-tip attachment.
Choose Tall-Cabinet Dimensions and Shelves for a Wood Pantry: Depth, Span, and Adjustment
Measure the opening before selecting a wood pantry. Common tall cabinets are about 12 to 24 inches deep, 18 to 36 inches wide, and 72 to 96 inches high. These are overall dimensions, not storage dimensions.
Usable depth is the space from the inside of the door or front obstruction to the back panel. Subtract the door, hinges, shelf lip, and rear clearance from the advertised cabinet depth. About 12 to 16 inches of usable depth works well for cans, jars, and boxed food. Eighteen inches or more can hold countertop appliances, but deep shelves make small items disappear behind larger ones.
Measure appliance depth with cords, plugs, handles, and ventilation space included. A cabinet that fits an appliance body may not accommodate the plug or allow heat to escape. Confirm the opening width between shelf supports, not just the external cabinet width.
Shelf span affects both capacity and sag. Wide shelves carrying flour, canned goods, or countertop appliances need thicker stock, a front stiffening edge, or a center divider. As a practical guide, a shelf around 24 to 30 inches wide needs more support than a narrow shelf, particularly when made from thinner boards.
Adjustable shelves provide more useful capacity than fixed shelves. Look for multiple rows of closely spaced shelf-pin holes, sturdy metal pins, and shelves that can be removed without dismantling the cabinet. Adjustment lets you create short spaces for cans and taller spaces for cereal boxes or bottles.
- Place heavy jars and appliances on lower shelves.
- Keep everyday ingredients between waist and eye level.
- Use shallow upper shelves for backup stock and infrequently used goods.
- Leave enough vertical clearance to lift bins and containers out without scraping the shelf above.
Plan Door Access, Drawers, Appliance Clearances, and Food Visibility
Door design changes how easily you can see and reach the interior. Double doors reduce the reach into a wide cabinet, while a single door can work better in a narrow opening. Confirm the full door swing, including handles, before placing the cabinet beside a wall, refrigerator, range, or island.
Door bins and racks add valuable shallow storage for spices, wraps, cans, and bottles. They also add weight to the hinges, so check the rack’s load rating and whether the shelves remain accessible when the door is open only 90 degrees. Avoid storing heavy glass containers high on a door.
Drawers are useful below the main shelves for packets, utensils, pet food scoops, and small items that otherwise become buried. Full-extension runners let you see the back of the drawer. Check the drawer’s internal height and width, because a decorative drawer front may conceal a shallow box.
Small appliances need more than shelf space. Measure the appliance in its operating position and allow room for cords, airflow, and hand clearance. Do not place a toaster oven, air fryer, coffee maker, or other heat-producing appliance in a closed cabinet unless the cabinet is specifically designed for that use. Ventilation openings should not expose food to dust or allow warm, damp air to collect inside.
Organize around visibility. A narrow pull-out, clear bin, or shallow shelf can prevent forgotten food at the back. Avoid making every shelf the full cabinet depth when a shorter shelf would improve sight lines. Labels help, but good spacing and lighting usually matter more.
Before finalizing the layout, test these access points:
- Can you open both doors fully without striking nearby cabinets?
- Can you remove a heavy appliance without lifting it over a shelf edge?
- Can you see labels on the rear row while standing normally?
- Can drawers open when the adjacent door or appliance is in use?
Place, Level, and Maintain a Wood Kitchen Pantry: Floor, Delivery, Restraint, and Care
Check the installation area before delivery. Measure the floor-to-ceiling height at several points, since a sloping ceiling may prevent a tall unit from standing upright. Locate baseboards, outlets, trim, heating vents, and uneven flooring. You may need a notch, filler strip, or recessed base to place the cabinet flush against the wall.
Measure the delivery path from the unloading point to the kitchen. Include exterior doors, stairways, hallways, tight turns, elevator openings, and the cabinet’s diagonal height. A fully assembled pantry can be difficult to rotate through a narrow doorway even when its width appears acceptable.
Protect the cabinet from heat and moisture. Keep it away from radiators, steam-producing appliances, plumbing leaks, and direct splash zones. Solid wood moves as humidity changes, so leave the manufacturer’s recommended expansion space and avoid forcing a tight fit between walls.
Set the cabinet on a sound, level floor. Use the supplied leveling feet or durable shims, then check the sides, shelves, and doors with a level. A cabinet that is out of square may develop rubbing doors, uneven gaps, or shelves that slide forward. Secure a tall unit to wall framing or an approved blocking point. Wall restraint is essential when doors, drawers, or shelves can shift the center of gravity.
Finish selection should match the room’s use. Clear finishes show grain and make repairs easier to blend, while painted finishes can brighten a dark pantry. Ask how the finish handles oil, water, and repeated wiping. On unfinished or lightly finished wood, test any conditioner in an unseen area first.
Clean the cabinet with a soft, slightly damp cloth and dry it promptly. Remove crumbs from shelf-pin holes and drawer runners before they collect moisture. Use mild soap only when the finish allows it; avoid abrasive powders, soaking-wet cloths, wax buildup, and harsh solvents. Wipe spills quickly, especially around lower shelves, door edges, and joints.