
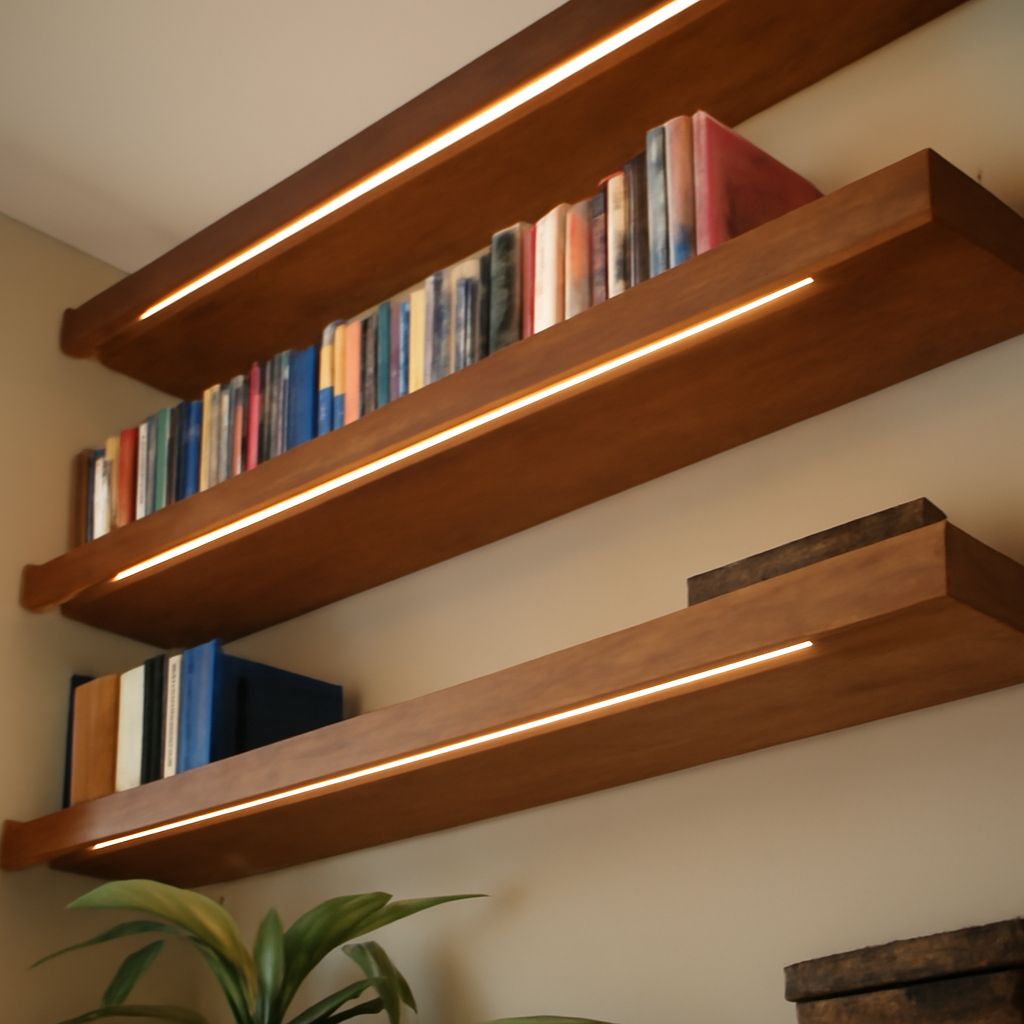
Shelf lighting works best when the fixture matches the visual task. Use a concealed LED strip or bar for an even wash, puck lights for focused pools, edge lighting for glowing glass or acrylic, and integrated shelves when you want the light source built into the furniture.
Plan brightness, color, beam spread, heat, wiring, switching, and service access before cutting channels or drilling shelves. The right combination makes displays readable without glare, hotspots, or visible cables.
Choose the shelf lighting effect
Start by deciding what the light must do. Display lighting should reveal objects and textures. Task lighting needs more usable brightness on a work surface. Cabinet lighting often needs a wide, low-glare wash rather than a bright point.
- Even display wash: Mount an LED strip or linear bar near the front underside of each shelf. Set it back about 25 to 50 mm from the front edge to reduce direct glare while keeping light on the objects.
- Focused emphasis: Use puck lights or narrow-beam modules above individual objects. Space them according to the beam diameter; a 30-degree beam may need closer spacing than a 60-degree beam.
- Glowing shelf edge: Feed light into the edge of clear or frosted acrylic. A 6 to 10 mm edge can work with a matching profile, but confirm the channel dimensions before ordering the shelf.
- Task illumination: Aim for approximately 300 to 600 lumens per metre on a work shelf, depending on the surface, distance, and surrounding light. Display shelves commonly need about 100 to 250 lumens per metre.
Lumens measure visible light output; watts measure electrical consumption. Compare lumens per metre for strips and total lumens for bars or pucks. A high-wattage fixture is not automatically brighter, especially when its diffuser, optics, or housing absorbs light.
Choose 2700K to 3000K for warm wood, artwork, and living spaces. Choose 3500K to 4000K when the shelf also supports reading, preparation, or detailed work. A color-rendering index of 90 or higher usually shows paint, food, wood, and textiles more accurately than basic low-CRI tape.
Compare shelf lights by form and beam
Each type of fixture solves a different problem. Treat the strip, driver, dimmer, and connector as a system rather than assuming that separate parts will work together.
- LED strips: Flexible strips fit long shelves, corners, and irregular layouts. Choose a strip width that fits the channel, commonly 8 to 12 mm, and check its voltage, wattage per metre, cut interval, and required driver. High-density strips produce a smoother line but create more heat.
- Linear bars: Rigid bars are easier to align and often include a lens that controls glare. They suit display cases and kitchen cabinets where a straight, durable fixture is preferred. Confirm the bar’s length and connector location before fixing the shelf.
- Puck lights: Pucks create distinct pools of light and can highlight ceramics, bottles, or artwork. They are less suitable for a continuous wash because spacing can produce bright circles and dark gaps. Place each puck over the area it should emphasize.
- Edge lighting: Edge-lit glass or acrylic creates a luminous shelf rather than a visible underside fixture. Frosted material hides bright points better than clear material, while polished edges transmit more light but can expose hotspots.
- Integrated LED shelves: A lighted shelf with a built-in channel gives the cleanest appearance and hides the fixture during installation. It requires accurate cable paths, suitable shelf thickness, and access to the LED connection if replacement is ever needed.
Beam angle determines spread. A wide beam covers more shelf depth but can spill onto the wall or into the viewer’s eyes. A narrow beam gives stronger emphasis but increases hotspot risk. Reflective backs, glossy paint, glass, and polished stone amplify glare, so use a frosted diffuser, a deeper channel, or a more recessed fixture.
Plan a lighted shelf around power and controls
Measure every shelf run before selecting the power supply. Add the wattage of all connected fixtures, then choose a driver with at least 20 percent spare capacity. For example, a 24-watt lighting run should use a driver rated for about 30 watts or more, provided the voltage and dimming method also match.
Voltage matters over distance. A 24-volt system generally loses less voltage than a 12-volt system across a long run, but it still needs correct wire sizing and connection limits. Keep each lead as short as practical; allow roughly 300 to 600 mm for a service loop near a shelf connection instead of stretching the cable tightly.
- Driver location: Put the driver in a ventilated cabinet or adjacent service space, not sealed inside a narrow shelf cavity. Leave at least 50 mm around it unless the manufacturer specifies another clearance.
- Outlet planning: Position the mains outlet within about 300 to 600 mm of the driver when possible. Keep it accessible rather than burying it behind permanent joinery.
- Switching: Use a wall switch, cabinet door sensor, motion sensor, or remote control based on the room’s use. A sensor usually needs 50 to 100 mm of clear approach space and should not face a nearby heat source or bright window.
- Dimming: Match the dimmer to the strip or bar’s voltage, control type, minimum load, and total load. A 12-volt PWM dimmer is not automatically compatible with a 24-volt constant-voltage system, and a trailing-edge mains dimmer may not control a low-voltage driver.
Check the driver, LED fixture, dimmer, and connectors as one compatible set. Some LED strips require a constant-voltage driver; others use a dedicated constant-current supply. Do not connect a dimmer simply because its current rating appears high.
Build lighted shelves with channels, diffusers, and concealed cable routes
Use an aluminium channel for LED strips whenever the fixture runs continuously or operates at higher brightness. The channel transfers heat into the shelf structure and gives the diffuser a consistent profile. Select a channel with internal width at least 1 to 2 mm wider than the strip, plus enough depth to prevent the diffuser from touching the LEDs.
For a typical 10 mm strip, allow approximately 12 to 14 mm of internal channel width. Recess the channel flush with the shelf underside when the material permits. If the shelf is too thin, use a surface-mounted profile and set it back from the front edge to hide the LED line from normal standing eye level.
Choose a clear diffuser for maximum output and a frosted diffuser for smoother light. Frosted covers reduce visible dots and hotspots but can lower output by roughly 10 to 20 percent. On glossy or reflective surfaces, the reduced output is often preferable to uncontrolled glare.
Route low-voltage cables through the rear quarter of the shelf, where objects are less likely to cover or pull them. Drill holes around 8 to 10 mm only after checking the plug or grommet diameter. Keep cable exits at least 20 mm from a shelf edge, and leave a 50 to 75 mm service loop behind each removable shelf.
For multiple shelves, use a vertical rear chase or side channel rather than separate exposed drops. Mark every cable before installation. If the shelves are adjustable, place connectors where a shelf can be removed without cutting wires.
Test LED shelves for brightness, heat, and service access
Test the complete installation before final adhesive, paint, or trim. Temporarily position the fixture, diffuser, shelf contents, and back panel so the reflected light resembles the finished design.
- Check the viewing angle: Stand at normal eye level and confirm that the LEDs, bright diffuser points, and reflections are not visible.
- Check coverage: Look for dark gaps between pucks, dim ends on long strips, and excessive light on the wall. Adjust spacing or setback before fixing the fixture.
- Check brightness: Run the lights at full output, then at the intended dimmed level. If the dimmed range flickers or cuts out, the control and driver may not be compatible.
- Check heat: Operate the system for at least 30 minutes. The channel may feel warm, but excessive heat, adhesive softening, or discoloration signals insufficient heat dissipation.
- Check access: Confirm that the driver, connectors, sensor, and dimmer can be reached without dismantling the entire unit. Keep at least 75 to 100 mm of working clearance where a component must be removed.
Inspect the far end of each long run for reduced brightness and compare it with the powered end. If the difference is obvious, shorten the run, use a larger conductor, feed power from both ends, or divide the shelves into separately powered zones.