
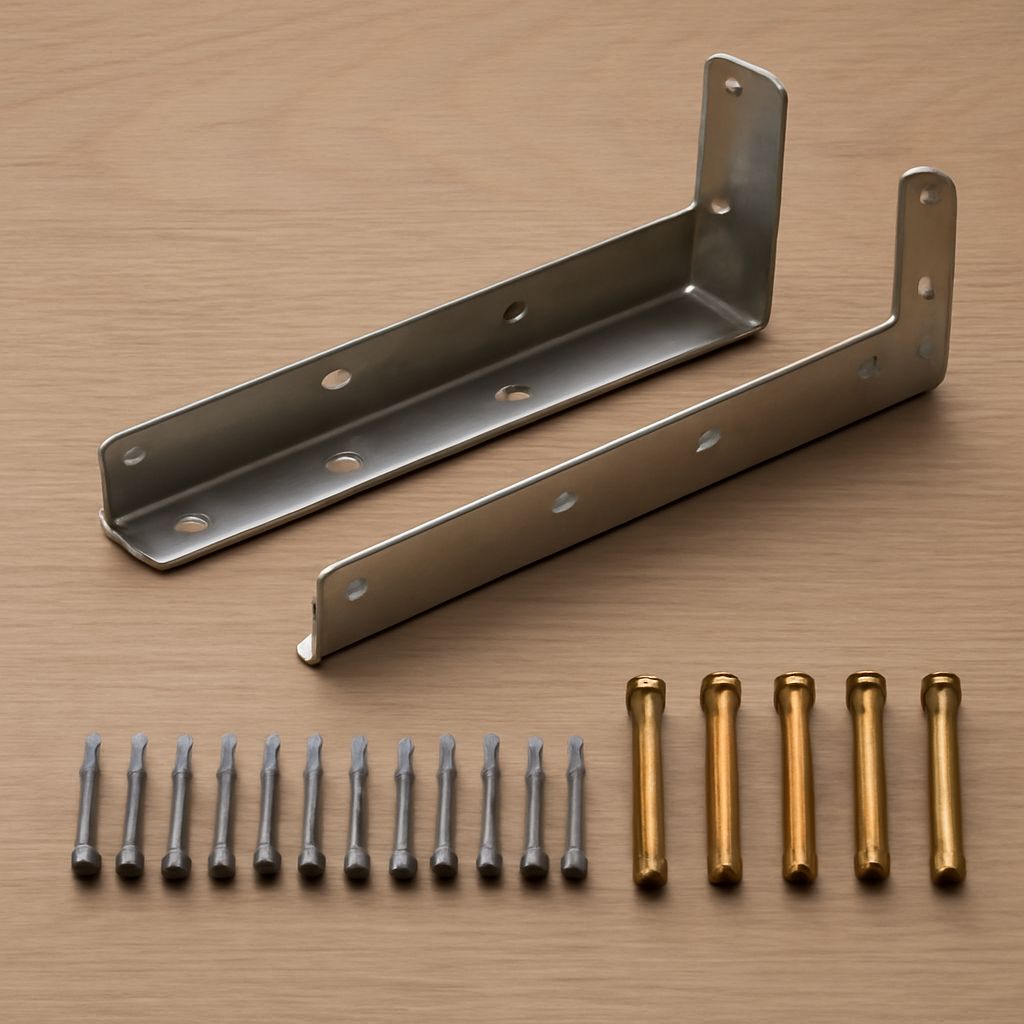
Shelf brackets are selected by four practical factors: shelf depth, expected load, wall substrate, and desired appearance. A shallow decorative shelf may need only concealed pins or a slim L bracket. A deep shelf carrying books, tools, or cookware usually needs gusseted supports, a cleat, or a structural rail.
Start by matching the support to the shelf and wall, then determine spacing, fasteners, and installation order. The best system keeps the shelf level, limits sag, and transfers weight into studs, masonry, or correctly rated anchors.
Shelf Brackets: L, Gusset, and Folding Supports
Visible brackets are the simplest shelf supports. They attach to the wall and carry the shelf from below, making their capacity and position easy to inspect.
- L brackets: These have a horizontal arm beneath the shelf and a vertical arm against the wall. They suit light to moderate loads and narrow or medium-depth shelves. Their clean, simple profile works well in utility rooms, offices, and minimalist interiors.
- Gusset brackets: A triangular brace reinforces the angle between the wall plate and shelf arm. This reduces flex under heavier or deeper loads. Choose gusseted supports for books, pantry supplies, workshop storage, or shelves wider than a typical decorative ledge.
- Folding brackets: These pivot against the wall when the shelf is not needed. They are useful for temporary work surfaces, laundry shelves, market displays, and compact spaces. Confirm the bracket locks open and that its load rating applies when fully extended.
Bracket depth should usually approach the shelf depth without extending beyond its front edge. A bracket that is too short leaves the shelf unsupported at the front. One that is too deep may be visible or interfere with objects.
Use two supports for short shelves only when the shelf is stiff and the load is modest. Longer shelves often need three or more supports. Place the outer supports near the ends, while keeping enough material beyond each bracket for a secure attachment. A center support helps control sag, but it does not compensate for weak wall fasteners.
Choose Shelf Mounting Brackets: Standards, Tracks, Cleats, Hidden Brackets, Concealed Rods, Pins, and Cabinet Rails
The right system depends on how it contacts both the shelf and the wall. Some shelf mounting brackets support from below. Others transfer weight through a continuous rail, a back cleat, or hardware hidden inside the shelf.
- Standards and tracks: Vertical standards screw to the wall and accept movable shelf arms. Twin-slot tracks provide adjustable positions and are useful when shelf height may change. They work especially well in closets, offices, garages, and storage rooms. Use standards with arms rated for the shelf depth and load; the track itself is only as secure as its wall fasteners.
- Cleats: A wood or metal cleat attaches along the back of the shelf. A French cleat uses interlocking angled pieces, distributing weight across a long wall connection. Cleats suit floating-looking shelves, wide shelves, and installations where several fasteners can reach studs or masonry.
- Hidden brackets and concealed rods: These support the shelf through a metal plate or rods inserted into holes drilled in the shelf. The result is a clean, floating appearance. The shelf must be thick and strong enough to accept the hardware, and the holes must align accurately. Concealed systems are less forgiving of crooked walls or inaccurate drilling.
- Pins: Shelf pins fit holes in cabinet sides, vertical panels, or compatible standards. They are ideal for adjustable cabinet shelves and lightweight storage. Pins usually provide limited resistance to forward tipping, so they are not a substitute for a wall bracket on a deep, heavily loaded shelf.
- Cabinet rails: Rails and adjustable cabinet hardware support shelves between side panels or within a cabinet carcass. They are best when the shelf is enclosed by vertical panels. If a rail is being adapted to a wall, verify that its design allows wall loading rather than only side-panel loading.
Choose visible supports when you want straightforward installation and obvious capacity. Choose a concealed system when appearance matters more and you can control shelf thickness, drilling, and wall alignment. Choose standards or rails when adjustability is more valuable than a seamless appearance.
Plan Shelf Mounts: Depth, Span, Support Count, and Wall Fasteners
Measure the shelf before buying shelf mounts. Record its length, front-to-back depth, thickness, material, and intended load. A 12-inch-deep solid-wood shelf behaves differently from a 16-inch-deep particleboard shelf, even at the same length.
Depth: Deeper shelves create more leverage against the wall. They need longer support arms, stronger brackets, and more reliable attachment. Keep heavy items toward the wall when possible. Check the manufacturer’s rating at the exact shelf depth, not only its maximum advertised load.
Span: Shelf length determines how much the shelf can sag between supports. Solid wood, plywood, and engineered panels have different stiffness. A thick shelf may span farther than a thin one, while particleboard often needs closer support. Add a center bracket, divider, or front stiffener when the shelf flexes under a representative load.
Support count: Two supports are common for short shelves, but longer or heavily loaded shelves may require three or more. Space supports evenly, with the outer supports set in from the ends. Avoid placing every fastener in one weak section of drywall. For a cleat or rail, distribute screws along the full length and prioritize structural points.
Wall substrate: Locate studs before selecting hardware. Wood studs accept structural wood screws, while concrete and masonry require suitable masonry screws or anchors. Metal studs may need toggle-style anchors, reinforcement, or a different mounting layout. Drywall-only anchors are appropriate only for light loads within their stated rating.
Use the fastener type specified for the bracket and substrate. The screw must pass through the bracket or rail and engage the anchor or structural material at the required depth. Do not replace a structural screw with a short general-purpose screw simply because it fits the hole.
Also account for forward pull. A shelf loaded near its front edge applies more leverage than the same weight placed against the wall. If children, pets, or frequent use could pull on the shelf, use a system with positive structural attachment and consider an anti-tip or restraint detail where appropriate.
Install Wall-Mounted Shelf Brackets: Level, Fasten, and Test
- Mark the shelf position. Measure from a fixed reference point and mark the desired top or bottom elevation. Check clearance from doors, windows, trim, outlets, and adjacent shelves.
- Locate the structure. Use a stud finder, small inspection hole, or measured framing layout. For masonry, identify a sound surface and avoid cracked areas or concealed services.
- Lay out the supports. Mark bracket centers, rail holes, or cleat locations. Use a level for the horizontal line, then confirm that the shelf will not collide with nearby features.
- Pre-drill correctly. Drill pilot holes for wood screws and the specified holes for masonry or hollow-wall anchors. Keep concealed-rod holes square to the shelf so the shelf seats fully against the wall.
- Attach the wall hardware. Drive fasteners until the bracket or rail is secure and flush, but do not crush drywall or strip the substrate. Recheck the level after tightening each support.
- Fit and secure the shelf. Set the shelf fully onto the arms, cleat, rods, or pins. Use the supplied retaining screws where required. For concealed hardware, confirm that the shelf is seated to its designed insertion depth.
- Test progressively. Press lightly at the front edge, then add the intended load gradually and evenly. Watch for bracket movement, anchor pullout, shelf slip, unusual creaking, or visible sag. Remove the load and correct the installation if any connection shifts.
After testing, measure the shelf again for level and inspect every fastener. A secure shelf should remain stable when loaded, with no progressive tilt, wall gap, or flex beyond the support system’s stated limits.