
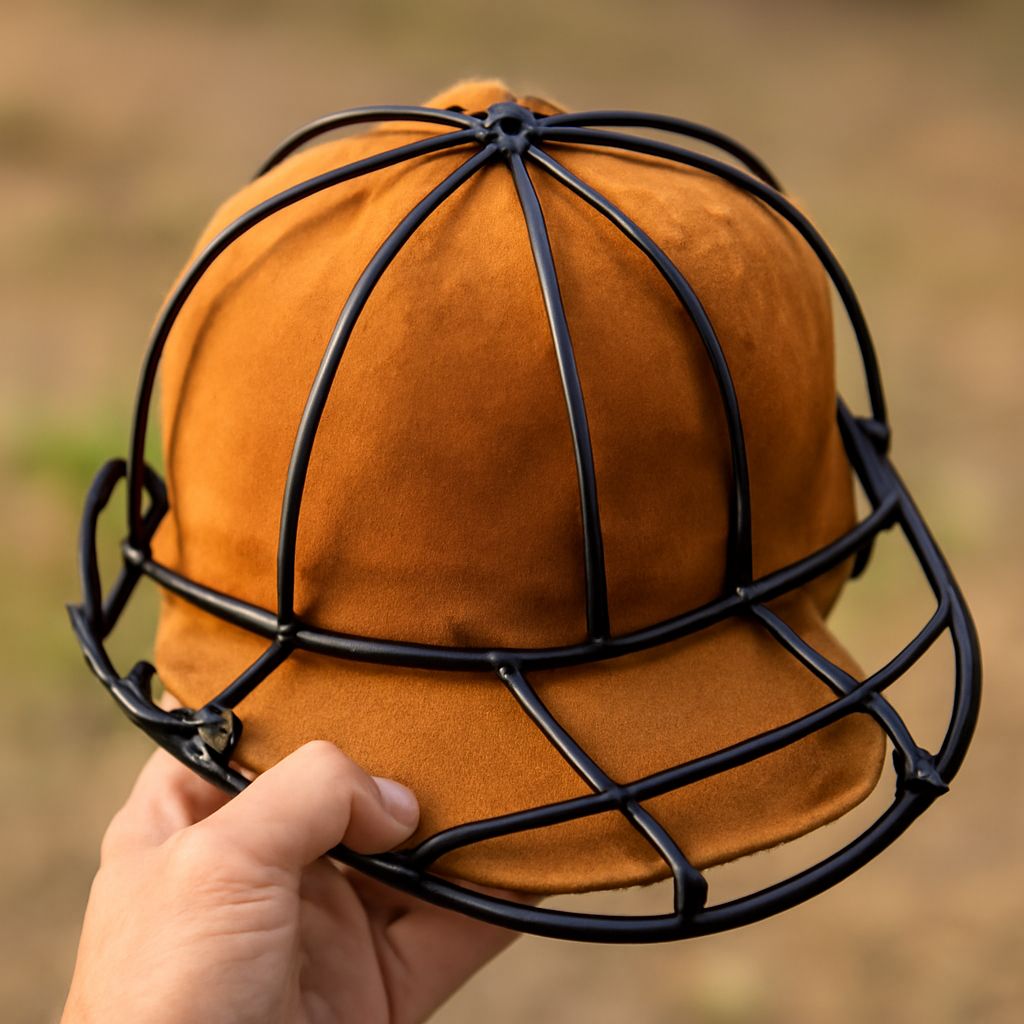
A hat washer is a protective cage that helps a cap keep its shape during cleaning. It does not clean by itself; it simply shields the crown and brim while you wash the hat gently, usually in a machine or by hand.
Used correctly, a baseball cap washer can help remove sweat, dirt, and odors without crushing the bill. The key is choosing the right cap, using low agitation, and drying it in shape so it finishes looking like the hat you started with.
What a Hat Washer Does
A hat washer, sometimes called a baseball cap washer, baseball hat washer, or ball cap washer, is a rigid plastic cage that holds a cap in place. The frame helps prevent twisting, bending, and flattening while the hat is exposed to water and detergent.
That protection matters because the cage is not the cleaning method. The washing still comes from the water, detergent, and movement of the cycle or your hands. The cage just reduces the damage that can happen when a cap tumbles freely.
Most hat washers work best for structured baseball caps with a curved brim. They are less suitable for delicate vintage caps, hats with fragile stitching, or caps with glued-on decorations that may loosen in water.
Check the Cap Before Washing
Before you use any hat washer, inspect the cap carefully. A few quick checks help you decide whether the cap can handle a machine-style wash or needs a gentler approach.
- Read the care label. If the label says hand wash only or do not wash, follow that instruction.
- Check colorfastness. Dab a hidden spot with a damp white cloth. If dye transfers, wash the cap by hand with extra care.
- Look at the brim. Plastic brims usually hold up better than cardboard or old composite brims, which can warp or break down.
- Inspect decoration. Embroidery is usually safer than glued patches, sequins, rhinestones, or heat-applied logos.
- Assess the material. Cotton and cotton blends are often easier to clean than wool, suede, leather, or specialty performance fabrics.
- Consider the age. Older caps are more likely to have weakened stitching, brittle adhesive, or faded dye.
If the cap is collectible, very old, or has sentimental value, hand washing is usually the safer choice. The same is true for hats with cardboard brims, delicate appliqués, or delicate embroidery that could fray.
Wash the Cap in the Washer
For a machine-style wash, start with the least aggressive method possible. Use a mild detergent and cool or lukewarm water. Hot water can shrink fabric, loosen adhesive, and set stains.
- Pre-treat stains. Apply a small amount of mild liquid detergent or stain remover to sweatbands, forehead marks, and visibly dirty spots. Let it sit for 10 to 15 minutes.
- Place the cap in the cage. Open the hat washer and seat the cap snugly so the crown and brim stay supported.
- Close the cage securely. Make sure the cap cannot shift, fold, or pop out during the cycle.
- Use a gentle cycle. Choose cold or cool water and the lowest practical agitation. Skip heavy-duty settings and high-speed spin if your machine allows it.
- Wash with similar items if needed. If you add laundry, keep it soft and light so it does not batter the cap.
- Rinse thoroughly. Residual detergent can leave spots or stiffness, so make sure the cap is fully rinsed.
If your machine has an extra-rinse option, it can help with thick sweatbands or heavily soiled caps. Avoid bleach unless the care label specifically allows it, and even then use it sparingly. A baseball cap washer gives the cap support, but it cannot protect it from harsh chemicals.
For a cleaner finish, shape the cap before you start the cycle. Smooth the crown, straighten the sweatband, and align the brim so the cage holds the cap in its natural form.
Reshape and Dry the Cap
Drying matters as much as washing. Many caps lose shape because they are dried carelessly, not because they were washed at all.
When the cycle ends, remove the cap from the cage right away. Gently press out excess water with a clean towel. Do not wring, twist, or fold the brim.
Next, reshape the cap while it is still damp. Smooth the crown with your hands and curve the brim back into its original angle. If the front panel has softened, stuff the crown lightly with a clean towel or form it over a rounded object that matches the cap’s shape.
Air drying is the safest option for most baseball caps. Place the cap in a well-ventilated area away from direct heat and strong sun. Heat from a dryer can shrink fabric, distort the brim, and weaken adhesives.
If the cap needs a little extra structure while drying, leave it in the hat washer cage or set it over a bowl, small fan, or cap form that supports the crown. Check it after an hour or two and adjust the shape if needed.
A cap is dry when the sweatband, crown, and brim all feel dry to the touch. If the brim still feels cool or damp, let it dry longer before storing or wearing it.
When Hand Washing Is Better
Choose hand washing when the cap is fragile, heavily decorated, or made from a material that does not tolerate machine-style agitation. This is often the best method for older caps, wool hats, leather trims, and anything with glued details.
Hand washing is also smart when you only need light cleaning. A small amount of dirt, sweat, or odor often comes off with less risk than a full machine cycle.
Use a basin or sink with cool water and a small amount of mild detergent. Dip a soft cloth or toothbrush into the solution and work on dirty areas gently. Pay attention to the sweatband and interior seams, then rinse with clean water until no soap remains.
After rinsing, press out water with a towel and reshape the cap immediately. Air-dry it exactly as you would after machine washing. For caps with cardboard brims or very delicate finishes, hand washing is usually the best way to clean them without damage.