
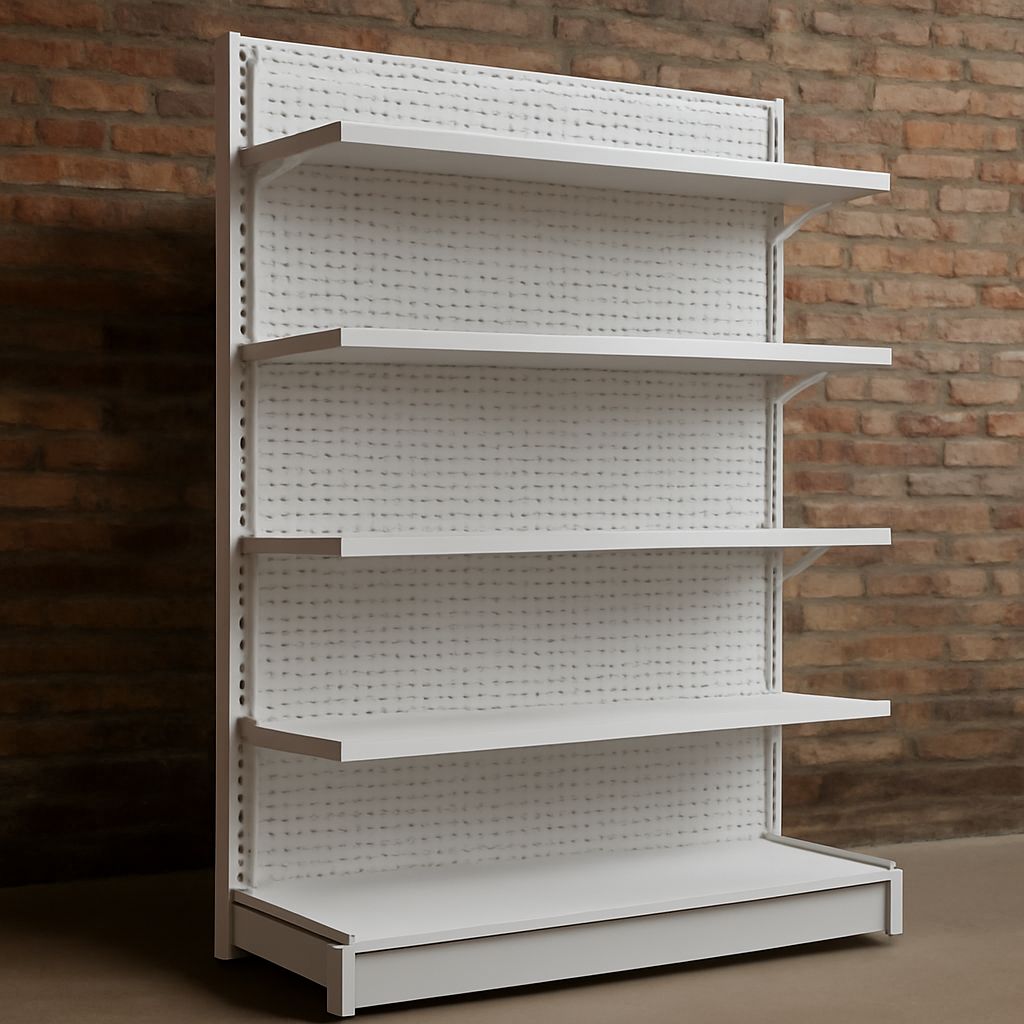
A gondola shelf purchase is complete only when the uprights, bases, shelves, brackets, backs, hardware, and finish work together. New systems usually provide a matched specification. Used equipment can offer strong value, but only after you confirm its manufacturer pattern, condition, missing parts, freight, and replacement options.
Use the checklist below before ordering a single bay or a full run. It will help you configure a stable retail layout instead of collecting shelves that cannot be assembled together.
Gondola Shelf Components: What Makes a Complete System
Uprights, Perforation, Bases, and Leveling Feet
Uprights are the vertical panels or posts that support the shelves. Check their height, width, depth, finish, and mounting pattern. Many systems use punched slots or perforations, but slot shape, spacing, and locking details vary by manufacturer.
The base sits at the bottom of each upright. It may include a low shelf, a recessed shelf, or a separate base deck. Confirm how the base attaches before buying replacement parts. Some designs use bolts, while others use hooks, clips, or proprietary connectors.
Leveling feet are essential on uneven floors. Inspect the threaded feet, adjustment range, mounting plates, and locking nuts. A missing foot can leave an entire run unstable, even when the upright itself appears undamaged.
Starter and Add-On Bays
A starter bay includes the components needed to begin a run, usually two uprights, a base, shelves, and connecting hardware. An add-on bay shares one upright with the adjacent section, reducing the number of vertical panels required.
Ask whether a quoted quantity refers to complete bays, starter bays, or add-on bays. For example, a five-bay run commonly needs one starter bay and four add-on bays. The exact arrangement depends on the manufacturer’s system and the number of exposed ends.
Shelves, Brackets, and Backs
Shelves determine both selling capacity and product presentation. Record each shelf’s width, depth, load rating, front-edge profile, and attachment method. Brackets must match the shelf and upright pattern. A shelf with the right nominal width can still fail to seat correctly if its brackets use a different hook geometry.
Backs can be solid steel, perforated panels, pegboard, wire, or open uprights. They affect appearance, product security, and whether merchandise can be displayed from both sides. Confirm whether backs are required for every bay or only selected sections.
Kick Plates, Top Caps, End Units, and Accessories
Kick plates cover the lower front area and protect the base from carts and foot traffic. Top caps finish the upright and can prevent dust, sharp edges, or accidental contact. End units close the exposed sides of a run and may include shelves, sign frames, slatwall, or special display panels.
Also identify signs, dividers, shelf lips, wire fences, hooks, baskets, brackets, connectors, aisle markers, and security accessories. These smaller parts often determine whether a used system is ready to install or needs a separate parts order.
Inspect Used Gondola Shelving Before You Buy
Inspect Bends, Rust, Welds, and Slots
Inspect used gondola shelving piece by piece, preferably before it is loaded for delivery. Place uprights on a flat surface and look for bowing, twisted edges, crushed corners, and bent feet. Minor cosmetic wear may be acceptable; distorted mounting points are more serious.
- Bends: Reject uprights, bases, or shelves that do not sit flat or align without force.
- Rust: Separate light surface oxidation from deep pitting, flaking metal, or corrosion around attachment points.
- Welds: Check for cracks, separation, repaired joints, and welds that have pulled out of alignment.
- Slots: Inspect perforations for elongation, crushed edges, blocked openings, and inconsistent spacing.
- Shelves: Look underneath for sagging, torn metal, damaged brackets, and overloaded sections.
Request clear photographs of both sides, not just a staged front view. Photos should show the bottom of the uprights, shelf connections, feet, backs, and any repaired areas.
Check Missing Hardware, Load Labels, Paint, and Cleaning
Count bolts, clips, hooks, nuts, leveling feet, connectors, and bracket pairs. Do not assume loose hardware is included because it appears in a photograph. Ask for a written component list and mark each item as included, missing, or conditionally available.
Find the load labels or manufacturer markings on uprights and shelves. If labels are missing, do not assign a load rating based on appearance or a similar model. The safe capacity depends on shelf construction, bracket spacing, upright design, and how the load is distributed.
Review paint for chips, peeling, stains, chemical damage, and mismatched touch-up areas. Surface wear can be cleaned or refinished, but heavy contamination may cost more to remove than expected. Ask whether the equipment has been stored indoors, outdoors, or in a damp warehouse.
For a new retail shelf system, confirm the finish, edge protection, and cleaning requirements before delivery. For used equipment, price cleaning, repainting, replacement labels, and labor as part of the purchase rather than treating them as free improvements.
Confirm Retail Shelf Dimensions and Compatibility
Match Manufacturer Patterns, Not Nominal Widths
Do not assume shelves and brackets from different gondola systems are compatible because their nominal widths match. A shelf described as 48 inches wide may use a different actual width, hook position, bracket depth, or upright spacing than another manufacturer’s shelf.
Record the manufacturer, model or series, upright perforation, slot spacing, shelf hook style, bracket angle, and base connection. When the manufacturer is unknown, request measurements and test-fit one shelf and bracket before purchasing a full quantity.
Compatibility also applies to backs, kick plates, top caps, end units, connectors, and accessories. A visually similar panel may require different fasteners or leave gaps that affect stability and appearance.
Measure Height, Depth, and Bay Width
Measure assembled dimensions rather than relying on advertised names. Record upright height, shelf depth, base depth, usable shelf width, overall bay width, and the projection of end units into the aisle. Measure at multiple points if the equipment is used.
Compare these dimensions with the store plan, product packaging, aisle clearance, door openings, and ceiling height. Allow space for corner conditions, end displays, carts, accessible routes, and any required distance from sprinklers or other building equipment.
Verify Replacement-Part Availability
Before buying, contact the manufacturer, distributor, or a specialist parts supplier with photographs and measurements. Confirm whether shelves, brackets, feet, backs, kick plates, and connectors are still available.
A low price is less attractive when one missing bracket requires replacing an entire bay. Keep a sample part or accurate drawing for future orders, especially when purchasing used stock with an uncertain production date.
Plan a Store Gondola Run: Quantities, Freight, and Assembly
Count Shelves, Bays, and End Units
Start with the merchandise plan. Decide the number of bays, shelf levels, base shelves, back panels, end units, and special accessories. Count both sides when the store gondola is double-sided.
- Count complete starter and add-on bays separately.
- List the shelf quantity for every bay and identify different depths or load requirements.
- Count uprights, bases, backs, kick plates, top caps, leveling feet, and connectors.
- Add end units only where a run terminates or needs an end display.
- Include a small, documented allowance for damaged or unusable used parts.
Draw the run with bay numbers and mark each component. This prevents a common error: ordering enough shelves for the total length but not enough brackets, backs, or shared starter uprights.
Estimate Freight Volume and Delivery
Freight is based on more than piece count. Confirm the packed dimensions, weight, pallet count, stackability, and whether shelves can nest. Uprights and end panels often create oversized freight even when the parts are light.
Ask whether delivery is dock-to-dock, curbside, or inside placement. Confirm liftgate needs, receiving hours, pallet disposal, damage inspection, and access for a long truck or trailer. Photograph damaged packaging before signing and compare the delivered count with the packing list.
Sequence Assembly, Leveling, and Final Load Check
Lay out components by bay number before assembly. Install the first starter bay, add each connected bay, attach backs and kick plates, then fit shelves and top caps. Use the manufacturer’s connector and bracket sequence rather than forcing parts into place.
Level the base and uprights before loading merchandise. Check that shelves are fully seated, bays are aligned, end units are secure, and no component rocks under light pressure. Finally, compare the planned merchandise weight with the available load labels and distribute heavy products on lower shelves.