
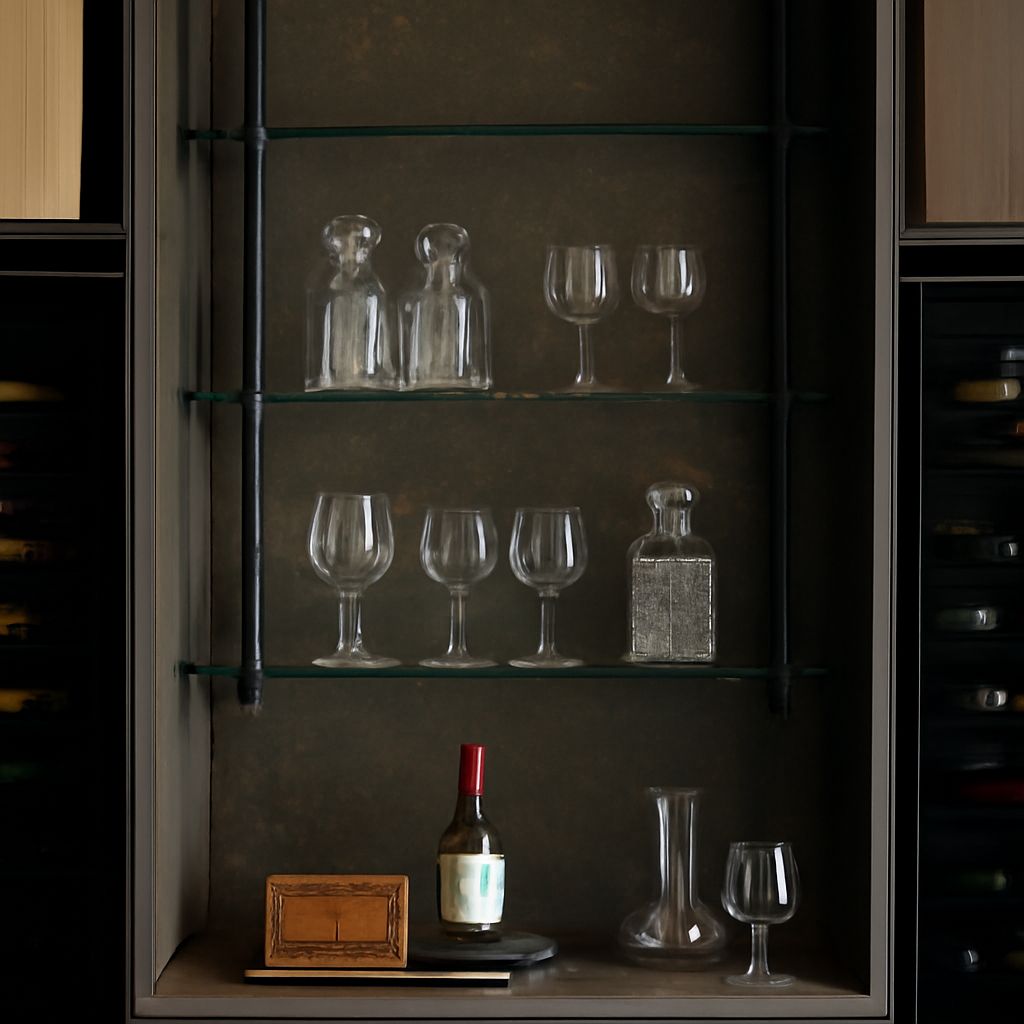
Floating glass shelves need more than a clean, unsupported look. Choose tempered glass, size it from the span, depth, and intended load, then match it with rated supports that provide the required edge engagement.
For walls, concealed rails and rods can create a genuinely minimal installation. Clips and clamps may look discreet, but they still remain visible and must carry the glass correctly. Cabinet installations require the same care, especially when panels are thin or made from composite board.
Floating Glass Shelves: Wall and Cabinet Planning
Start by deciding what each shelf will hold. Decorative objects, toiletries, and lightweight glassware create different demands from books, cookware, or heavy equipment. Include the weight of the items, not just the shelf itself, and plan for uneven loading near the front edge.
Wall-mounted shelves usually span between two or more supports fixed to studs, masonry, or a properly rated anchoring system. A long shelf with few supports can twist or flex, even when the glass looks substantial. Cabinet shelves often have shorter spans, but their support may rely on narrow side panels, a back panel, or pre-installed shelf hardware.
- Wall shelves: Confirm stud or masonry locations, finished wall thickness, support spacing, and the required clearance from adjacent trim or doors.
- Cabinet shelves: Check the inside width, depth, side-panel thickness, hinge swing, and whether the cabinet can accept drilling or concealed hardware.
- All installations: Set a maximum intended load before ordering the glass and hardware.
Do not treat an unsupported-looking shelf as unsupported in practice. The glass must engage far enough with its rail, rod, sleeve, clip, or clamp to meet the hardware maker’s specification. The support must also be rated for the span, glass thickness, and intended load.
Glass Floating Shelves: Tempered Glass, Thickness, Span, and Edges
Use safety-tempered glass for most exposed shelving. Tempered glass is stronger than ordinary annealed glass and breaks into smaller pieces if it fails, but it is not unbreakable. It cannot be cut, drilled, or notched after tempering, so every hole, notch, and corner detail must be finalized before fabrication.
Thickness should follow the unsupported span and load rather than appearance alone. As a general planning range, 6 mm glass suits short, lightly loaded shelves with appropriate support. Longer spans or heavier objects commonly require 8, 10, or 12 mm glass, subject to the support system’s rating and the glazier’s calculation.
Depth also affects performance. A shallow shelf places less leverage on its supports, while a deep shelf increases bending and the chance of front-edge impact. Keep the depth within the hardware rating, and avoid placing heavy items at the unsupported front edge.
Give the fabricator final dimensions, not rough opening sizes. Specify the finished width, depth, thickness, corner shape, holes, notches, and edge treatment. Allow for the support’s insertion depth and any clearance needed for installation.
- Edges: Request polished edges wherever an edge can be touched or seen. A flat polish removes the sharp cut edge; a small arris or bevel can further reduce impact risk.
- Corners: Use square corners only where they will not catch clothing or collide with doors. Radius, clipped, or eased corners are often better for exposed shelves.
- Notches and holes: Position them from a scaled hardware template, with enough glass around each opening for the specified support.
- Surface contact: Use compatible rubber, neoprene, or other approved padding between glass and metal. Bare metal can create point pressure and rattling.
A floating glass shelf should arrive fully finished. Never ask an installer to trim, drill, or grind tempered glass on site.
Choose a Floating Glass Shelf: Concealed Rails, Clips, and Clamps
A truly concealed system hides the main support behind or inside the shelf. Common designs use a wall-fixed rail with metal pins, sleeves, or a continuous channel that extends into preformed openings in the glass. These systems offer the cleanest appearance, but they depend on precise fabrication and sufficient support engagement.
Clips and clamps are different. They may be small, clear, or color-matched, yet they remain visible and grip the glass from below, above, or at the sides. They can be a practical choice when drilling the glass is undesirable, when adjustment is useful, or when the shelf is narrow. They are not a substitute for rated hardware.
Compare each system using the same criteria:
- Load rating: Confirm the rating for the complete assembly, not just one bracket.
- Span: Check the maximum distance between supports and the recommended number of supports.
- Glass compatibility: Match the bracket to the glass thickness and any required holes or notches.
- Engagement: Verify the minimum glass insertion or bearing length. Do not shorten the shelf or stop it early to preserve a concealed appearance.
- Adjustment: Prefer systems with leveling adjustment, especially on uneven walls or cabinet panels.
- Padding: Confirm that supplied pads or sleeves isolate the glass from hard metal.
For a long wall shelf, a continuous concealed rail often distributes load more evenly than two small point brackets. For a short decorative shelf, properly rated clips may be simpler. In either case, follow the support manufacturer’s spacing and tightening requirements.
Glass Shelves for Cabinets: Fit, Substrate, and Support Engagement
Measure the cabinet at several points because side panels are not always parallel. Record the smallest clear width, usable depth, and vertical clearance above the shelf. Subtract the manufacturer’s required side clearance and any space needed to insert the glass into concealed supports.
Identify the substrate before selecting hardware. Solid wood and plywood generally provide better screw retention than MDF or particleboard. A thin decorative panel or cabinet back may not support a loaded shelf by itself. If possible, fasten into structural side panels, a reinforced top, a vertical divider, or a properly installed backing strip.
Cabinet doors and drawers need their full operating clearance. Place the shelf far enough behind the door line to prevent contact, and check hinge movement at both corners. If a shelf has a notch around a hinge or fitting, use a template and specify rounded internal corners where possible. Sharp internal corners concentrate stress.
Use glass shelves for cabinets with polished exposed edges and suitable protective pads. Shelf pins can work for light loads when the cabinet manufacturer rates them for the span, but they do not automatically provide a concealed floating installation. The shelf must sit evenly on every support without rocking.
Measure, Install, Level, and Load-Test the Shelf
- Confirm final dimensions. Measure the finished wall or cabinet opening after tile, trim, paint, and liners are complete. Recheck width, depth, diagonals, and obstructions. Order the glass from these final dimensions.
- Mark bracket positions. Transfer the support template to the wall or cabinet. Mark every fastener, rail end, and centerline. Use a level rather than the ceiling, cabinet top, or nearby trim as the reference.
- Check the substrate. Locate studs or masonry, then select anchors rated for that material. Do not rely on drywall, a thin back panel, or a weak cabinet skin unless the hardware is specifically designed for it.
- Install and level the supports. Fix the rail, rods, clips, or clamps without forcing them out of alignment. Confirm their spacing and height before placing the glass.
- Prepare the contact points. Fit the specified pads, sleeves, or gaskets. Remove grit and confirm that no screw head or metal edge can touch the glass directly.
- Set the glass carefully. Engage the shelf to the specified depth at every support. Keep the weight centered while seating it, and do not lever or twist the glass into place.
- Tighten correctly. Tighten clamps evenly to the supplied torque or hand-tightening instruction. Over-tightening can create concentrated pressure; under-tightening can permit movement.
- Check level and movement. Test the front and side edges with a level. Gently press near each support and listen for rattling, clicking, or shifting. Correct the support or padding before adding weight.
- Load gradually. Place light items near the supports first, then distribute the planned load across the shelf. Add heavier items slowly and keep them away from unsupported edges. Stop if the shelf rocks, rattles, contacts metal, or shows any chip or crack.
The finished installation should remain level, quiet, and stable under its intended load. Never use the shelf as a handhold, and replace glass that becomes chipped, cracked, or permanently loose.