
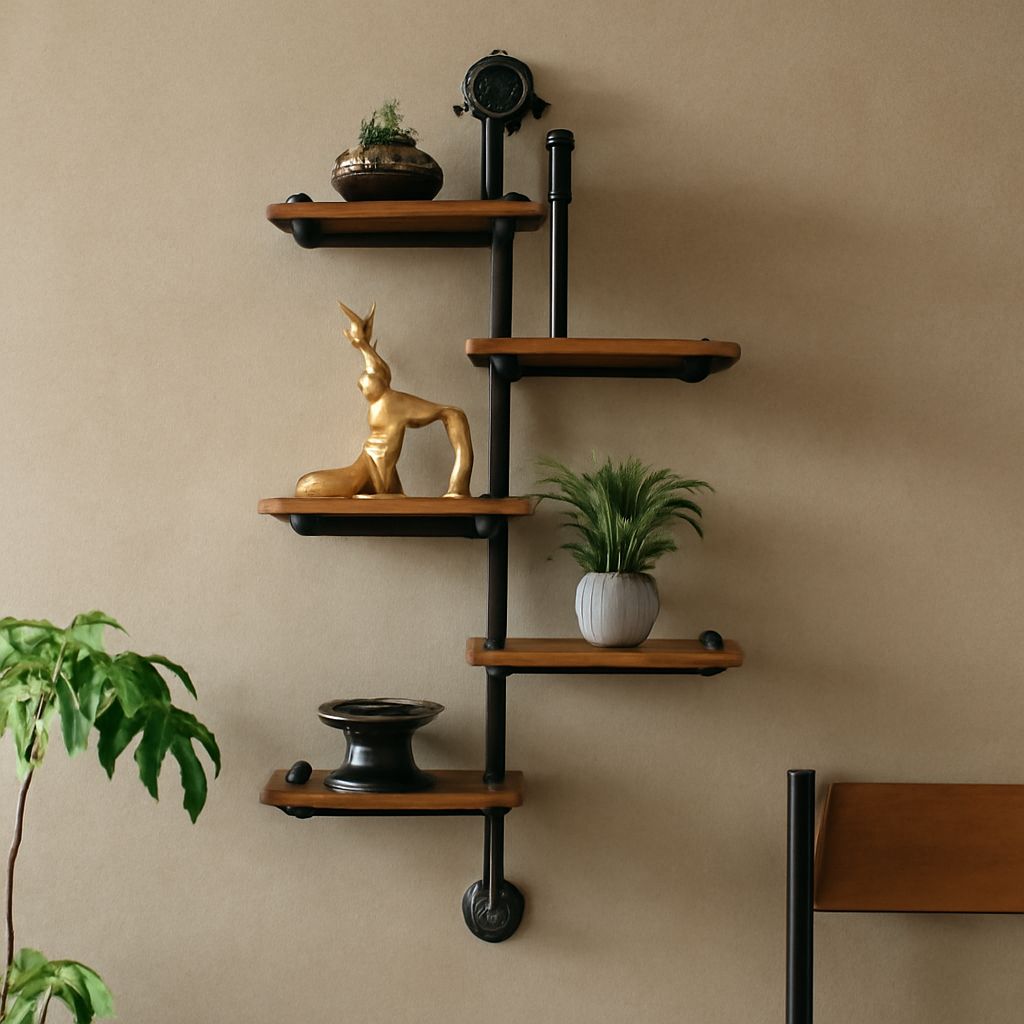
Black pipe shelves are easiest to install when the kit matches your wall, board depth, and intended load. Choose a complete kit for faster assembly, or buy separate pipe, flanges, boards, and fasteners when you need exact shelf lengths or custom spacing.
The key measurements are pipe projection, board dimensions, flange locations, and the distance between wall supports. Confirm those details before drilling, then dry-assemble, clean, seal, mount, level, and load-test the finished shelving.
Black Pipe Shelves: Choose a Kit or Components
When a Black Pipe Shelf Fits Best
A black pipe shelf works well for books, pantry items, cookware, plants, and display pieces. Its wall flanges and threaded fittings create a visible industrial style, while wood boards add warmth.
Use a kit when you want matched parts and a predictable assembly process. Most kits combine preselected pipe sections, fittings, flanges, and sometimes boards or mounting hardware. This reduces measuring and compatibility problems.
Choose component-built shelving when the available kit does not fit your wall. Separate parts let you change board length, shelf depth, pipe diameter, support spacing, and finish. They also make it easier to work around outlets, trim, corners, or uneven masonry.
For heavier storage, component selection is usually more important than appearance. Larger-diameter pipe, more wall attachment points, thicker boards, and closer supports generally provide greater stability. The wall and fasteners still determine the practical load limit.
Compare Completeness With Customization
A complete kit saves time, but it may include short screws, unsuitable anchors, or decorative flanges that do not provide enough structural attachment. A component-built design takes longer to plan, yet lets you match every part to the wall and load.
Compare both options using the same criteria:
- Kit completeness: Does it include pipes, fittings, flanges, boards, screws, anchors, and shelf-fixing hardware?
- Adjustability: Can you change shelf length, depth, spacing, or support positions?
- Wall compatibility: Are the supplied fasteners designed for your studs, masonry, or another substrate?
- Load path: Do the boards transfer weight into pipe supports and then into securely mounted flanges?
Pipe Shelf Kit Checklist: Verify Parts and Dimensions
Pipe Size, Flanges, and Fastener Count
Check the nominal pipe size before ordering. Half-inch pipe creates a lighter visual profile, while three-quarter-inch pipe looks heavier and may better suit deep or heavily loaded boards. Confirm the outside dimensions when checking clearance around the boards.
Count every flange and fitting against the assembly diagram. A typical layout may use wall flanges at the back, vertical pipe sections between shelves, and elbows or caps at exposed ends. The exact arrangement varies, so do not assume that a visually similar fitting has the same structural role.
Count fasteners separately from flanges. Each flange should have enough suitable screws or bolts for all usable holes, plus compatible anchors where studs are unavailable. Supplied screws may work in wood but not in concrete, brick, hollow block, or metal studs. Plan replacements before installation rather than substituting random wall plugs.
Board Dimensions, Finish, and Assembly Order
Measure the board’s actual length, depth, and thickness. Nominal lumber sizes are not the finished dimensions. Check that the board clears the pipe fittings and that its depth does not exceed the support design.
Pipe projection must suit the board depth. A shelf that overhangs the pipe too far can feel unstable, even when the flanges are firmly attached. Allow room for fittings, wall trim, and your fingers when placing items on the shelf.
Inspect the finish on both materials. Black pipe may have an oily protective coating, while unfinished boards may absorb moisture or stain unevenly. Decide whether the metal will remain matte, receive a clear protective coat, or be painted. Select a wood sealer appropriate for the room and the board material.
Read the assembly order before tightening anything. Some systems require the pipes to pass through drilled boards; others use brackets, collars, or pipe straps. Verify which parts support the board and which parts merely connect the pipe sections.
Confirm Actual Wall Attachment
Do not confuse a decorative flange with complete wall support. Confirm where each flange attaches and whether its holes align with solid framing or an approved masonry anchor. A kit is not ready for installation until its included hardware can connect the shelf to your actual wall.
For stud walls, plan to place the main flanges over studs whenever possible. For masonry, select anchors rated for the specific material and expected load. Drywall alone is not a reliable attachment point for a heavily loaded shelf. If a flange cannot reach a stud, use a properly installed structural backing method or a suitable masonry-style fastening system for that wall.
Prepare the Pipe-and-Wood Shelf
Plan Projection and Flange Locations
Draw the shelf layout on the wall before assembling it. Mark each board’s finished length, front edge, shelf height, and support centerlines. Keep the shelves clear of doors, switches, outlets, trim, and nearby cabinets.
Use the actual pipe and flange dimensions when marking. Center supports under the board where possible, but move them to avoid weak board areas, knots, or wall obstructions. Keep support spacing consistent unless the wall layout requires an intentional change.
Check vertical alignment with a level or plumb line. Flanges that are slightly offset can twist the pipe frame and make boards sit unevenly. Mark every screw location, then recheck the overall layout from several feet away.
Dry-Assemble, Clean, and Seal
- Lay the parts on the floor in installation order. Confirm pipe lengths, fittings, flange orientation, board openings, and shelf spacing.
- Thread or connect the pipe hand-tight, leaving enough adjustment to align the flanges. Do not force fittings with excessive torque, which can damage threads or finishes.
- Test each board in its final position. Confirm that it slides over the supports, clears the wall, and sits without rocking.
- Degrease black pipe with a suitable cleaner and clean cloths. Remove residue until the cloth no longer picks up oil, then let the metal dry completely.
- Sand sharp board edges and apply the chosen sealer or finish to all faces, including end grain. Follow the product’s drying time before assembly.
Seal the wood before final mounting when possible. It is easier to coat the underside and edges on a workbench than against the wall. If the pipe finish can transfer onto the board, add a compatible clear coat after cleaning and drying the metal.
Black Pipe Shelving: Mount and Level It
Find Studs or Prepare Masonry
- Locate studs with a stud finder and confirm their positions with a small test hole or measured reference. Mark the flange centers and screw holes.
- For masonry, identify whether the wall is brick, concrete, block, or another material. Drill with the correct bit and install anchors according to their instructions, including hole diameter and depth.
- Hold the first assembled section against the layout marks. Check the height, side-to-side position, and flange contact before drilling.
- Attach the upper or primary flanges first, using the correct screws or bolts. Tighten them firmly without crushing drywall or damaging masonry.
Where a flange has several holes, use the maximum number that can enter solid framing or properly installed anchors. Avoid placing all fasteners into a weak surface layer. If the kit’s holes miss the studs, do not enlarge them casually; use an approved backing plate, alternate flange, or redesigned support position.
Fix the Shelf, Level It, and Load-Test
- Install the remaining pipe sections and boards in the manufacturer’s stated order. Keep fittings slightly adjustable until the frame is aligned.
- Check each board from front to back and side to side with a level. Adjust threaded fittings or support positions, then tighten the connections.
- Secure each board using its intended collars, brackets, straps, screws, or other fixing hardware. A board that only rests loosely on pipe can slide or tip when loaded.
- Recheck every flange screw, pipe connection, board fixing, and vertical support. Correct any rocking, twisting, gaps, or visible wall movement.
- Load the shelves gradually. Start with a small distributed load, wait briefly, and inspect the wall attachments and frame before adding more.
Stop the load test if the shelf sags noticeably, the board shifts, fittings loosen, anchors move, or the wall cracks. Redistribute items toward the supports and reduce the load until the assembly remains level and stable.