
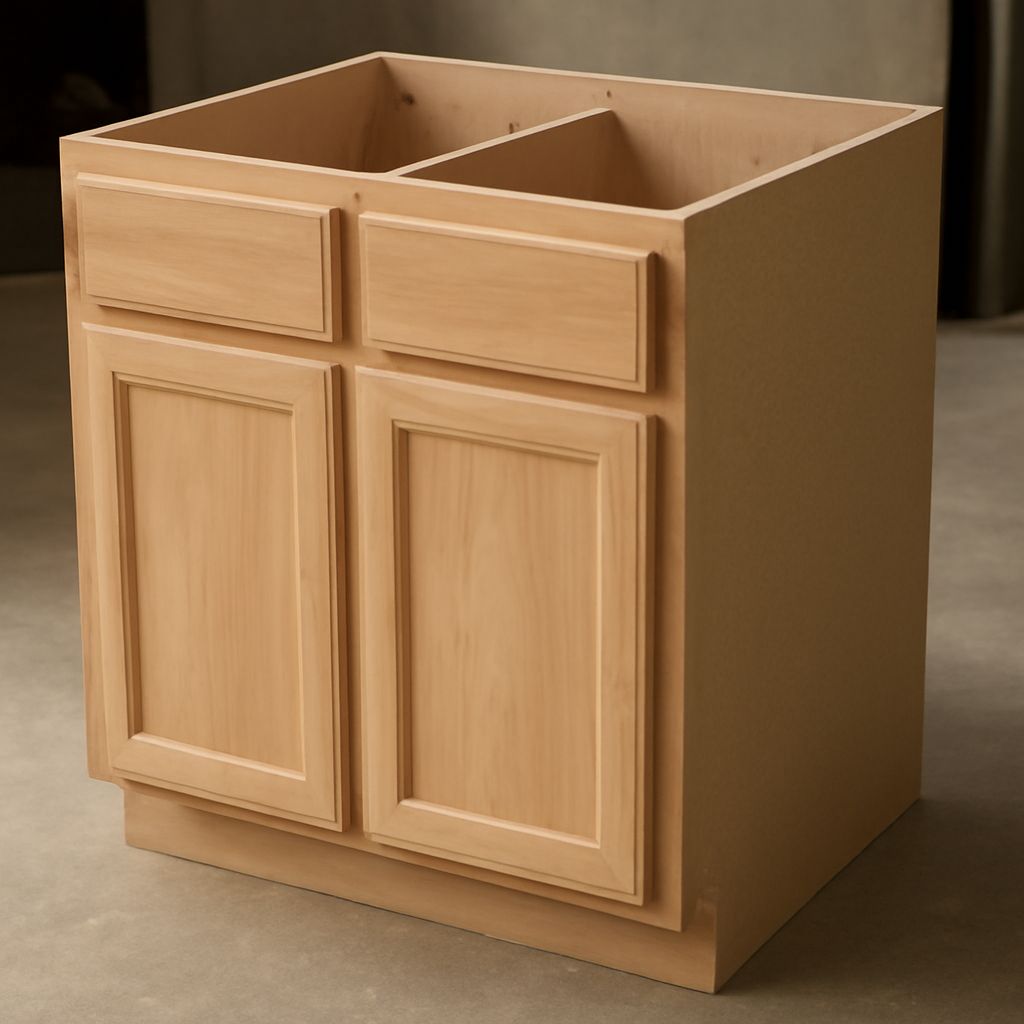
An unfinished cabinet is not automatically ready for stain. Inspect its construction, veneer, glue, dents, and sanding before choosing a finish. That short review prevents uneven color and visible repairs later.
Unfinished oak cabinets provide pronounced grain and dependable stain absorption, while other species may need different preparation. Unfinished kitchen cabinets also require a work plan for doors, interiors, dust control, curing, hardware, and installation.
Unfinished Cabinet Inspection: Construction, Grain, Veneer, and Defects
Inspect every component under bright, angled light. Check the face frames, doors, drawer fronts, end panels, and cabinet boxes before sanding or applying products.
- Identify solid wood and veneer. Rails, stiles, and door frames may be solid wood, while large panels and end panels are often wood veneer over plywood or another substrate.
- Examine veneer edges. Look for lifted edges, open seams, bubbles, chipped corners, and uneven transitions. Do not aggressively sand thin veneer; it can expose the substrate quickly.
- Find glue and filler. Dried glue squeeze-out resists stain and creates pale patches. Remove it carefully with a sharp scraper, then sand without rounding the joint.
- Mark dents and defects. Small dents may respond to controlled moisture and heat only when the manufacturer permits it. Deep dents, voids, and broken edges usually need compatible wood filler or replacement parts.
- Check the sanding state. Some components may be rough-sanded while others are nearly finished. Uneven sanding produces uneven absorption.
Oak has open, prominent grain with visible cathedral patterns on many flat-sawn panels. Its pores accept stain, but end grain often absorbs more quickly and becomes darker. Maple has subtler grain and can show blotching; birch can also color unevenly. The species, cut, veneer, and adhesive all affect the final result.
Confirm that doors close properly and that drawer parts are square before finishing. Repairing construction after finishing risks scratches, glue marks, and mismatched touch-ups.
Unfinished Oak Cabinets: Choose Stain, Clear Finish, or Paint
Choose the finish according to the desired color, grain visibility, maintenance needs, and species. Test the complete system rather than judging a stain alone.
- Stain: A penetrating stain changes color while leaving oak grain visible. Wipe off excess consistently and avoid letting puddles dry in corners, profiles, or end grain.
- Clear finish: A clear waterborne or solvent-based topcoat preserves a natural appearance, though some products add amber warmth. Clear finishes do not hide glue, dents, or uneven sanding.
- Paint: Paint conceals color variation but may emphasize open oak pores. Use a compatible grain filler when a smoother surface is required, then prime repaired areas and exposed substrate.
- Toner: A toner combines color with a transparent coating. It can even out mild variation or adjust a stain, but excessive buildup can look cloudy or obscure grain.
Wood conditioner is not an automatic requirement for oak. Use it when the stain manufacturer recommends it for the species or when sample boards show unacceptable blotching. Conditioner can reduce contrast and may weaken the color, so test it alongside an untreated sample.
Plan the finish schedule before starting: surface preparation, stain if used, toner if needed, sealer, light de-nibbing, and protective topcoat. Confirm compatibility between every layer. A sealer can lock in color, reduce uneven absorption, and prevent the topcoat from disturbing a wiped stain.
Unfinished Kitchen Cabinets: Sanding, Repairs, and Sample Boards
Remove dust and loose debris before repairs. Fill nail holes, splits, and small voids with a product that accepts the chosen finish. Use a stainable filler for stained work, and a paintable filler for painted work.
- Sand rough surfaces with 120-grit paper, using a sanding block on flat areas and the grain direction whenever possible.
- Refine the surface with 150-grit, then use 180-grit where the finish schedule calls for it. Do not polish the wood excessively, because over-sanding can reduce stain absorption.
- Ease sharp edges lightly, but do not round door profiles or veneer corners.
- Sand end grain carefully and inspect it separately. It may need a lighter stain application or a controlled sealer coat to prevent a dark stripe.
- Vacuum the surface, wipe it with the product-approved cleaner, and allow it to dry completely.
Make a sample board from the same species and, ideally, the same veneer and door construction. Reproduce the entire schedule: sanding, conditioner if applicable, stain, toner, sealer, and topcoat. Include a door edge or end-grain section so you can judge those areas too.
Label each sample with the product names, color, coat count, wipe time, and sanding sequence. Let the sample dry and cure through the same stages planned for the cabinets. Approve the sample in daylight and under the room’s artificial lighting before processing the full set.
If the color is too dark, shorten the stain dwell time or dilute only as the product instructions allow. If it is too pale, test another coat or a toner. Do not alter the production batch until the revised sample is dry and topcoated.
Apply Finish: Interiors, Doors, Dust Control, and Coat Timing
Remove doors, drawer fronts, shelves, and hardware before finishing. Label each part and store screws and hinges in separate containers. Finishing removable parts on a flat, supported surface improves access and reduces runs.
Finish cabinet interiors when they are accessible, especially the sink base, shelf edges, and exposed plywood edges. Use the same protective system inside and outside unless the product instructions specify otherwise. Seal cutouts, exposed end grain, and vulnerable edges where moisture could enter.
For a typical stain schedule, apply stain in manageable sections, maintain a wet edge, and wipe excess consistently after the tested dwell time. Allow it to dry for the label-specified period, commonly overnight. Apply toner only after the underlying layer is dry and uniform.
Apply sealer in thin, even coats. After it dries, remove nibs with the recommended fine abrasive, often 320-grit, without cutting through corners or veneer. Apply two or more topcoats as required, respecting the product’s recoat window. Longer drying is necessary when humidity is high, the coat is heavy, or ventilation is poor.
Control dust by separating sanding from finishing, vacuuming floors and surfaces, and keeping doors closed during application. Wear the required protective equipment and maintain product-approved ventilation. Do not apply a new coat over a surface that feels cool, tacky, soft, or easily marked.
Cure and Install: Hardware, Touch-Ups, and Moisture Checks
Dry and cured are different conditions. A finish may be dry enough to touch but still soft beneath the surface. Check an inconspicuous area for tackiness, fingerprints, odor, and imprinting before stacking parts or installing them.
Follow the product’s full cure period before loading shelves, tightening hardware, or cleaning the surface. Protect cured-looking parts with clean paper or soft spacers during transport. Avoid plastic wrapping that can trap moisture against a curing finish.
Install cabinet boxes after the accessible surfaces have received their planned coats and the finish is sufficiently cured. Complete post-installation work with fillers, scribe pieces, exposed fastener covers, and small edge touch-ups. Keep a labeled sample and a small amount of each approved coating for this purpose.
Install hinges, pulls, and knobs after the finish can resist drilling pressure and handling. Use a sharp bit, back the hole with scrap, and place protective tape around the drilling area. Wipe away dust before fitting hardware.
After installation, inspect sink bases, dishwasher sides, countertop cutouts, toe-kicks, and end-grain areas. Seal gaps and exposed edges according to the cabinet and finish system. Keep standing water off the surfaces, repair scratches promptly, and allow the finish to reach full cure before regular cleaning.