
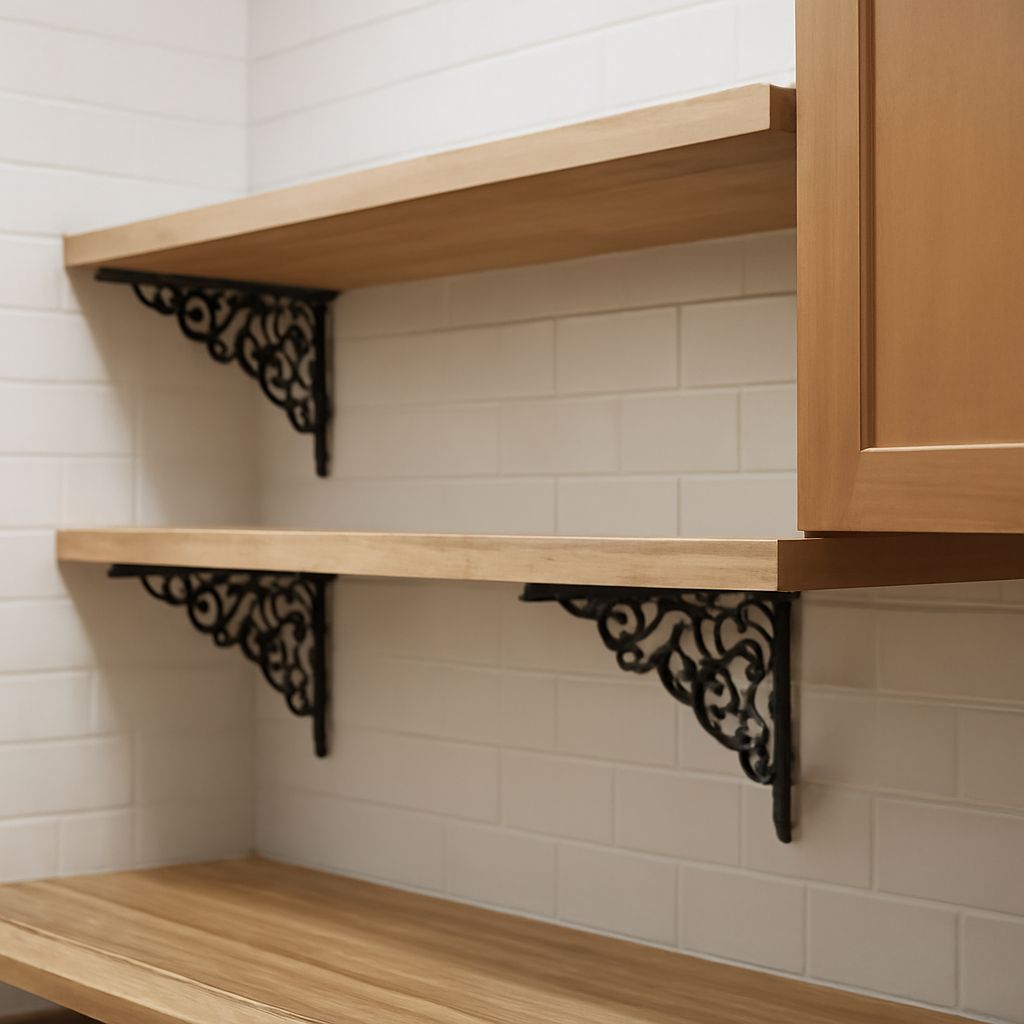
Iron shelf brackets work best when their arm depth, hole layout, and fasteners match both the shelf and the wall. For a typical 10- to 12-inch-deep shelf, choose a bracket with an 8- to 10-inch supporting arm, place brackets 16 to 24 inches apart, and use shorter spacing for heavy loads.
Before buying, check the shelf thickness, desired front overhang, wall substrate, and bracket load rating. The most attractive bracket is not suitable if its holes miss the studs, its gusset crowds the storage area, or its finish cannot tolerate the room’s humidity.
Iron Shelf Brackets: Cast, Forged, and Fabricated Styles
Cast iron brackets are made from a mold. They commonly feature repeated patterns, floral details, and deep decorative relief. Cast designs suit traditional, farmhouse, and heritage interiors. Their thicker sections can look substantial, but some cast pieces are brittle and may have rougher edges or less precise holes.
Forged iron brackets are shaped by hammering heated metal. They usually show tapered ends, gentle bends, and slight variations that create a hand-worked appearance. Forged brackets suit rustic, old-world, and industrial rooms. Inspect the welds or transitions around the arm and vertical leg, particularly on larger brackets.
Fabricated iron brackets are cut, bent, and welded from flat bar, angle, or tube. They provide cleaner lines and more consistent dimensions. Simple black fabricated brackets work well in contemporary interiors, while welded triangular gussets can provide strong support without ornate decoration.
Choose the bracket construction for both appearance and geometry. Decorative scrollwork can add visual character, but it may reduce the clear space beneath the shelf. Measure the lowest point of the scroll or gusset before placing baskets, books, or containers. A triangular gusset should sit fully under the shelf and connect the arm to the vertical leg without twisting.
Many products described as iron are actually steel with an iron-look finish. That is not necessarily a disadvantage; steel often provides predictable strength. Confirm the material, dimensions, hole size, and stated load rating when those details matter.
Match Iron Brackets to Shelf Dimensions
Measure the shelf depth from the wall to the front edge. The supporting arm should reach close to the front without extending beyond it. As a practical guide, select an arm at least two-thirds of the shelf depth, leaving about 1 to 2 inches of shelf overhang beyond the arm. For a 12-inch shelf, an 8- to 10-inch arm is a useful starting range.
Do not measure decorative scrollwork or a rounded outer tip as usable arm length. Measure the straight, load-bearing portion that sits beneath the shelf. If the shelf will hold dense books, cookware, tools, or stone objects, use a deeper arm and closer spacing rather than relying on a decorative shape.
- Arm length: Supports the shelf from the wall toward the front edge. It should not leave a large unsupported front section.
- Shelf overhang: The shelf can extend slightly beyond the arm, but excessive overhang increases leverage against the wall fasteners.
- Vertical leg: Choose a leg tall enough for two vertically separated wall fasteners where possible. More separation reduces rotation and keeps the bracket stable.
- Gusset size: Confirm that the diagonal support fits beneath the shelf and does not obstruct the storage area.
- Hole positions: Check the distance between holes and from each hole to the leg edges. The pattern must fit the available stud or anchor locations.
- Shelf thickness: The arm must sit flat beneath the shelf, and its shelf screws must be shorter than the board thickness.
A 1-inch-thick shelf commonly takes screws around 5/8 to 3/4 inch long through the bracket arm, depending on the arm thickness. Leave clearance below the shelf’s top face; a screw that breaks through can damage the finish or cause an injury. For thinner shelves, use shorter screws and predrill carefully.
Also check the bracket’s overall height against trim, outlets, and nearby shelves. A tall vertical leg may be stronger, but it can conflict with a baseboard or prevent the bracket from sitting flat against the wall.
Plan Shelf Bracket Spacing, Fasteners, and Mounting
For light or medium household storage, space brackets about 16 to 24 inches apart, with the outer brackets roughly 4 to 8 inches from each shelf end. Use closer spacing, often 12 to 16 inches, for heavy loads, thin shelves, brittle materials, or shelves made from boards prone to sagging. A long shelf usually needs a center bracket even when the end brackets are securely attached.
Base the layout on the shelf material and the expected load, not only on appearance. A solid hardwood shelf tolerates more span than particleboard of the same thickness. Distribute objects across the shelf, and keep unusually heavy items near the brackets rather than at the center.
- Find the wall structure. Use a stud finder and confirm stud centers with a small test hole. For masonry, identify whether the wall is brick, block, or concrete before selecting anchors. Do not assume drywall alone can carry a loaded shelf.
- Mark a level line. Decide the shelf height, then draw a level line along the intended top or underside of the shelf. Account for the shelf thickness when transferring the bracket position.
- Mark bracket positions. Hold each bracket in place, center it on the planned location, and mark every wall hole. Keep the leg flat against the wall and check that the arm is square to the wall.
- Drill pilot holes. Drill a pilot hole into each wood stud using the size recommended for the fastener. For masonry, use the anchor manufacturer’s drill size and depth. Avoid oversized holes, which reduce holding strength.
- Install the wall fasteners. Use structural wood screws or lag-style screws long enough to penetrate the stud adequately. In concrete or brick, use rated masonry screws or expansion anchors. In drywall without a stud, use a properly rated toggle or hollow-wall anchor only for modest loads; ordinary plastic plugs are not suitable for heavy storage.
- Secure the brackets. Start all fasteners before tightening them. Check the level again, then tighten firmly without crushing drywall, stripping the hole, or distorting the bracket.
- Fix the shelf to the arms. Place the shelf centrally, mark the underside through the arm holes, and remove it. Drill shallow pilot holes, then drive shelf screws through the arms. Keep every screw shorter than the shelf thickness.
- Load gradually. Test the empty shelf first, then add light items and inspect for movement, wall separation, or shelf deflection. Add heavier items in stages and stop if the bracket shifts or the shelf begins to sag.
When studs do not align with the desired layout, consider a continuous wood mounting board secured to several studs. Attach the brackets to that board, then place the shelf over the brackets. This spreads the force more reliably than depending on multiple drywall anchors.
Finish Options for Black Iron Shelf Brackets
Black iron shelf brackets are usually painted, powder-coated, waxed, oiled, or chemically darkened. Powder coating gives a hard, even surface that suits kitchens and other moderately humid rooms. Painted finishes are easy to touch up, but exposed edges and chipped areas can rust. Oil, wax, and blackened finishes provide a softer natural look and work best in dry interiors with regular maintenance.
Iron and unprotected steel can corrode when moisture reaches the metal. Before installation, inspect cut edges, welds, screw holes, and the back of the vertical leg. Clean dust and fingerprints from the surface, then apply the manufacturer’s recommended touch-up paint, wax, or protective oil. Do not seal over dampness or active rust.
Dust finished brackets with a soft, dry cloth. For occasional cleaning, use a lightly damp cloth and dry the metal immediately. Avoid abrasive pads and harsh cleaners, which can dull powder coating or remove protective wax. In bathrooms, utility rooms, or coastal homes, inspect the finish periodically and repair chips as soon as they appear.