
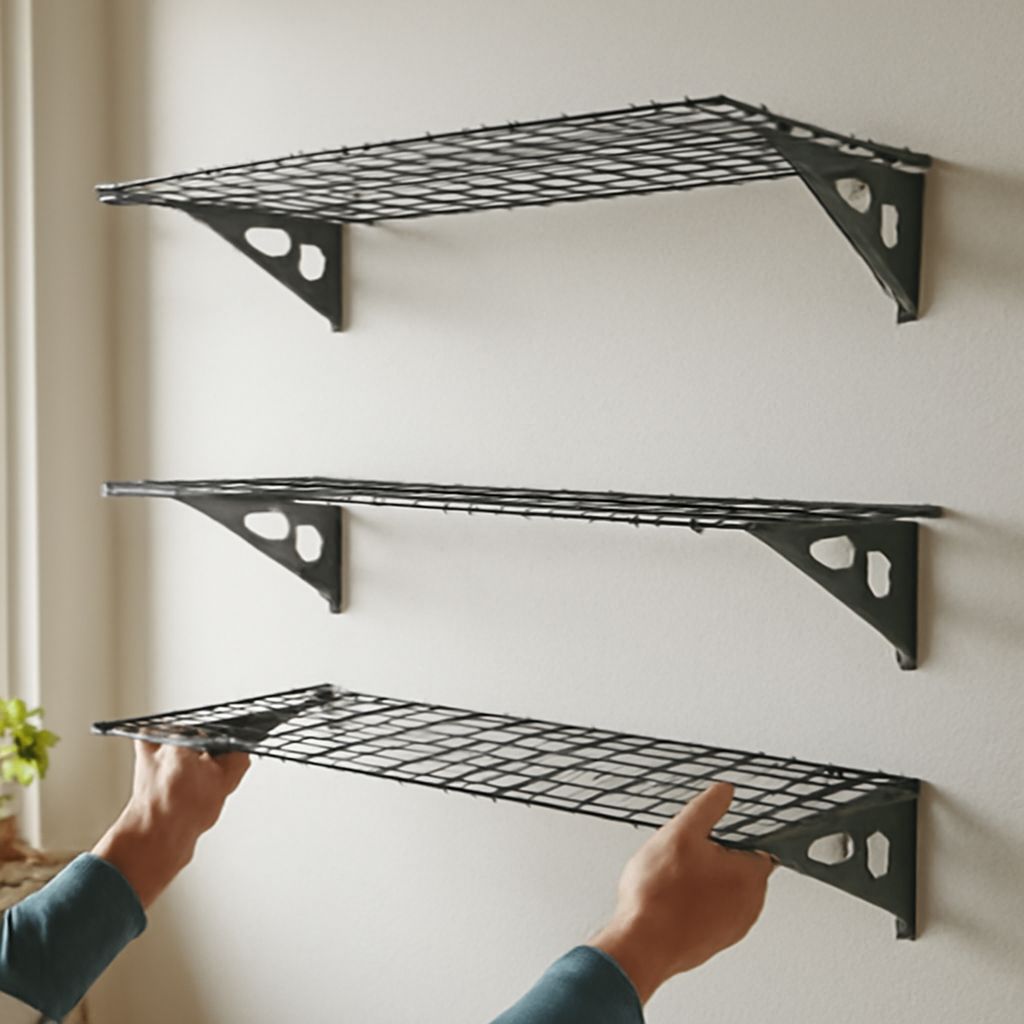
Garage wall shelving should be planned around the parked vehicle, moving garage door, utilities, and work areas before you choose brackets or boards. As a starting point, use 12–16-inch-deep shelves for general storage, 18–24-inch shelves for bulky items, and closer support spacing for heavier loads.
Map the wall first, then select a system that matches the substrate, shelf span, and item weight. A reliable installation uses structural fasteners, level rails or brackets, fixed shelves, labeled zones, and gradual loading from the bottom upward.
Map the Garage Wall Before Choosing Garage Wall Shelving
Draw each usable wall on paper or mark it with painter’s tape. Record dimensions from the floor, nearby corners, and the ceiling. Do not measure an empty garage only; measure the garage in its normal working condition.
- Parking envelope: Park each vehicle in its usual position. Mark the vehicle body, open doors, mirrors, hatch movement, and walking space. Keep deep shelves outside this envelope so storage cannot obstruct entry or damage the vehicle.
- Garage-door movement: Trace the path of the overhead door, rollers, tracks, springs, and opener arm. Shelves must not project into the door’s travel area. Measure the tracks at their widest points, including vertical and horizontal sections.
- Head clearance: Mark walking routes and the height of people carrying boxes. Avoid shelf corners and deep projections where they reduce comfortable headroom. A shelf that starts above shoulder height still needs clearance for lifting and retrieval.
- Windows and panels: Leave windows accessible for light, ventilation, cleaning, and emergency egress. Do not cover removable wall panels or inspection points.
- Utilities and outlets: Locate electrical outlets, switches, water lines, gas lines, heating equipment, cable routes, and exposed pipes. Keep shelves clear of equipment service zones and avoid drilling where utilities may run.
- Work zones: Reserve space above and beside the workbench for tools used frequently. Account for the bench surface, vise swing, tool handles, and the reach needed to place items on shelves.
- Bins and floor storage: Measure existing bins, rolling cabinets, ladders, bikes, and trash containers. Decide which items move onto the wall and which must remain on the floor.
Mark the remaining wall areas as shallow, standard, or deep storage zones. This prevents a continuous shelf from extending through a doorway, vehicle path, or work area where only a narrow shelf would fit.
Choose Shelf Dimensions and Compare Wall-Mounted Garage Shelving Systems
Choose shelf depth according to the items, not the maximum available wall space. Twelve inches suits paint cans, hand tools, small bins, and folded equipment. Sixteen inches handles most storage totes. Eighteen to 24 inches works for large containers, but requires more clearance from vehicles and walking paths.
Measure the actual bins before setting shelf depth. Add enough room to grip the front and lift the container without scraping the shelf above. For shelves above a workbench, keep frequently used items within comfortable reach and place rarely used storage higher.
Common wall-mounted garage shelving systems differ in flexibility, capacity, and installation effort:
- Bracket systems: Individual heavy-duty brackets support lumber or finished panels. They suit short runs, custom depths, and layouts interrupted by windows or utilities. Brackets are easy to reposition, but each bracket and its fasteners must support the load.
- Rail systems: Horizontal rails distribute loads across several wall fasteners and accept adjustable brackets. They work well when shelf heights may change. Use rails only when their stated capacity matches the shelf and mounting surface.
- Vertical standard systems: Upright standards attach to the wall, with movable brackets supporting each shelf. They offer useful height adjustment for bins of different sizes. Fasten every standard securely and keep the standards within the shelf manufacturer’s span limits.
- Lumber systems: Framed cleats, ledger boards, and plywood or solid lumber create a custom solution. They are economical for long, fixed runs, but require accurate cutting, strong wall connections, and protection against sagging.
- Steel systems: Welded or formed steel shelving handles high loads and repeated use. It is a good choice for dense tools, parts, and containers when the wall and fasteners can carry the same capacity. Verify the rating for the complete assembly, not the shelf panel alone.
For long shelves, divide the run at studs, standards, or brackets rather than relying on one unsupported span. A deeper shelf also needs stronger framing because its front edge creates greater leverage against the wall.
Plan Heavy-Duty Garage Wall Shelving Support by Substrate and Load
Calculate the intended load before buying hardware. Add the weight of every stored item, container, and shelf component. Then select a system with a capacity comfortably above that total. The weakest part—shelf material, bracket, rail, fastener, or wall—sets the practical limit.
Heavy-duty garage wall shelving needs a support plan based on the wall substrate:
- Wood studs: Locate studs with a scanner, magnet, or small confirmation holes. Drive structural screws or lag screws into the center of the studs, using the diameter and embedment specified for the bracket or rail. Do not count drywall thickness as structural embedment.
- Concrete or solid masonry: Use anchors rated for the wall material and the expected load. Drill with the correct bit, clear dust from each hole, and install the anchor to its required depth. Concrete and brick have different anchor requirements, so identify the substrate first.
- Hollow block: Use anchors specifically approved for hollow masonry, or connect to a designed backing structure. A fastener that works in solid concrete may not have the same capacity in a hollow cell.
- Drywall alone: Do not use ordinary drywall anchors for heavily loaded shelves. Add structural backing, fasten through the drywall into studs, or install a properly designed framed support.
Space brackets according to the shelf material and load. A useful planning range is 16–24 inches apart for moderate loads, with 12–16-inch spacing for heavier items, long shelves, or flexible boards. Follow the system’s instructions when they require closer spacing. Place a support near each end and avoid unsupported overhangs unless specifically designed for them.
Check both vertical and horizontal forces. A shelf can pull fasteners out when someone lifts a heavy bin from the front. Use brackets with adequate vertical capacity and a broad wall connection. For ledger-style designs, fasten the ledger at every available structural point and add front support when the span or depth increases.
Install Wall-Mounted Garage Shelves with Level, Secure Fixings
- Clear and mark the zone. Remove vehicles and loose items. Transfer your wall map to the wall, marking shelf elevations, support locations, utilities, and the no-go areas around door tracks and equipment.
- Confirm the substrate. Identify stud centers or masonry type. Check the proposed drilling points for wiring, plumbing, and equipment clearance. Shift the layout rather than forcing a fastener into an uncertain location.
- Set the first reference line. Use a long level or laser to mark the rail, ledger, or bracket height. Measure from several fixed points so the shelf does not gradually slope across the wall.
- Install the wall supports. Hold each rail, standard, ledger, or bracket on the line. Drill the correct pilot or anchor hole, then tighten fasteners firmly without crushing drywall or deforming the hardware.
- Check alignment. Confirm supports are level with one another and square to the wall. A shelf that is level at one end can still twist if brackets sit at different depths.
- Prepare and fix the shelf. Cut lumber or panels accurately, smooth exposed edges, and place the shelf fully on its supports. Secure it with the recommended screws, clips, or retaining hardware so it cannot slide during retrieval.
- Test clearance. Reopen the garage door, walk the route, open vehicle doors, and operate the bench or cabinets. Check that bins can be removed without striking tracks, lights, vehicles, or the ceiling.
Use shelf lips, end stops, or retaining rails where vibration could move containers. Keep fasteners flush or protected so they cannot catch clothing, cords, or storage bins.
Label and Load Shelves Safely, Keeping Heavy Items Low
Divide the finished storage into labeled zones before filling it. Label shelves by purpose, such as automotive fluids, seasonal equipment, fasteners, painting supplies, or household overflow. Put matching bins together and label the front and lid when both may be visible.
- Heavy items low: Store batteries, power tools, full containers, metal parts, and dense hardware on the lowest suitable shelf or in floor cabinets. Lower storage reduces the lifting hazard and keeps the wall load easier to control.
- Medium-weight items in the middle: Place regularly used bins and equipment where you can lift them without twisting or reaching over your head.
- Light items high: Reserve upper shelves for empty containers, seasonal textiles, lightweight decorations, and infrequently used gear.
- Respect shelf ratings: Spread weight across the shelf instead of concentrating it at the front or between supports. Never exceed the lower rating of the shelf, bracket, fastener, or wall.
- Load gradually: Start with a small portion of the planned weight. Inspect for shelf deflection, bracket movement, loose anchors, cracking, or wall damage, then add weight in stages.
Keep an aisle and working clearance around every loaded shelf. Recheck the installation after the first full load and periodically thereafter, especially after moving heavy bins or changing shelf positions.