
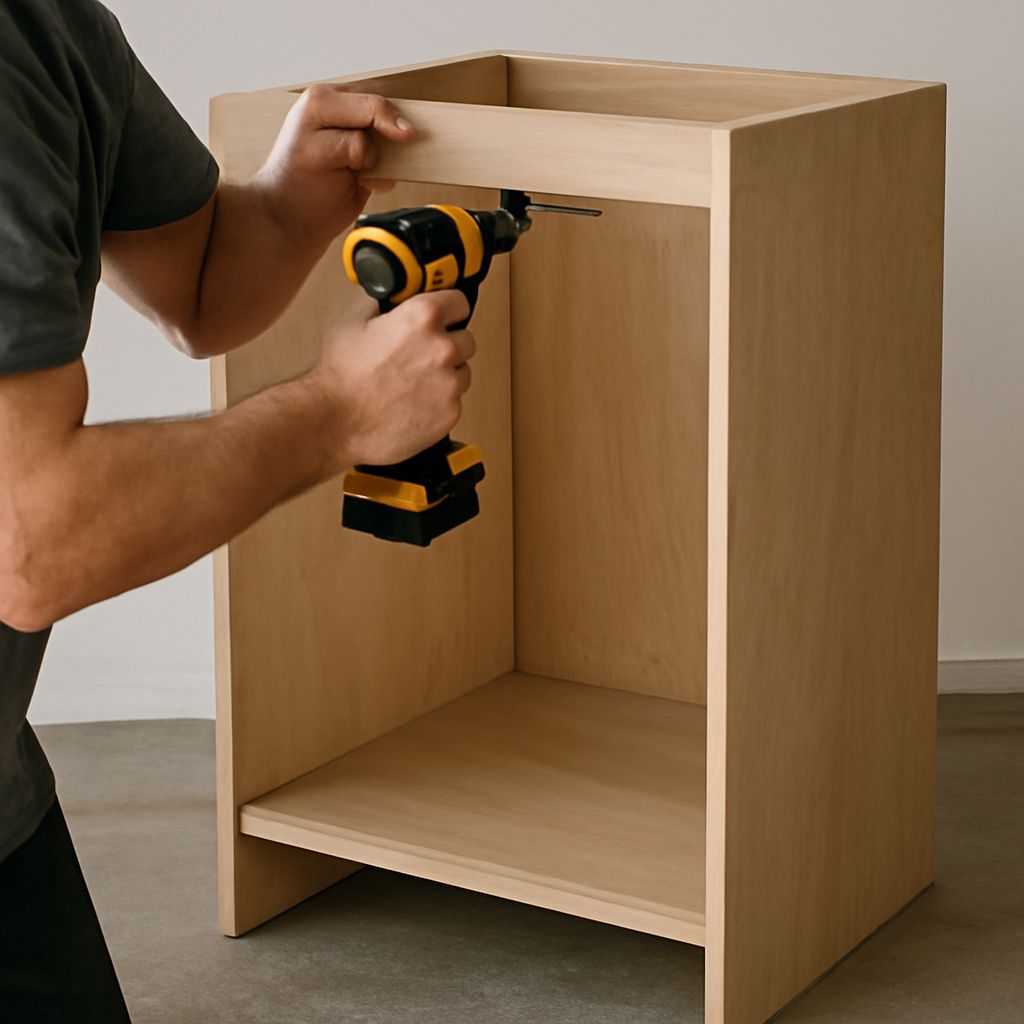
Cabinet boxes are the structural core of base, wall, and tall units. A well-designed box uses consistent material thickness, strong joints, and a back that keeps the assembly square.
For most projects, use 3/4-inch plywood or furniture-grade sheet material, then choose framed or frameless construction. Set the finished width, height, depth, openings, and installation clearances before cutting any parts.
Cabinet Boxes: Anatomy, Dimensions, and Cut Lists
Start with the cabinet’s finished outside dimensions. A typical base unit is 24 inches deep and 34 1/2 inches high before the countertop. Wall units are often 12 inches deep, while tall units may match the base depth.
Subtract the material thickness and construction details from the outside dimensions. For a 24-inch-wide frameless box made from 3/4-inch stock, a bottom installed between two full-height sides is usually 22 1/2 inches wide. Its depth depends on whether the back is applied, inset, or installed in a rabbet.
Make a cut list before breaking down sheets. Include the part name, quantity, finished length, finished width, grain direction, edge treatment, and joinery. A simple list might include:
- Two sides, each 34 1/2 by 24 inches.
- One bottom, 22 1/2 inches wide, with its depth set by the back detail.
- Two stretchers, 22 1/2 inches wide and 3 to 4 inches deep.
- One back, sized for its mounting method.
- One or more shelves, sized for the clear interior opening.
Confirm these dimensions against your actual material thickness. Nominal 3/4-inch panels can vary, and a face frame, inset back, toe kick, or applied end changes the final size. Mark the finished front edge on every part before machining.
Cabinet Carcass: Sides, Tops, Bottoms, Stretchers, and Frames
The cabinet carcass is the assembled structural shell. The sides carry most of the load and establish the unit’s height and depth. The top closes the upper edge, while the bottom supports drawers, shelves, and stored weight.
Stretchers run between the sides near the top or back. They tie the box together, support a countertop, and provide solid fastening points. A full back can perform the same stabilizing function while closing the cabinet and preventing racking.
A face frame is a hardwood framework attached to the front edges of a framed cabinet. Its vertical stiles and horizontal rails hide plywood edges and define door openings. In a frameless cabinet, the box front remains exposed, and doors mount directly to the sides and top and bottom edges.
Fixed shelves add rigidity when joined permanently. Adjustable shelves rest on shelf pins, clips, or standards and should be slightly narrower and shallower than the opening. Keep shelf edges straight and support wide shelves with a front nosing or center divider when necessary.
Framed or Frameless: Materials, Joints, Backs, and Shelves
Choose face-frame construction when you want traditional proportions, visible stiles, and forgiving door alignment. Choose frameless construction when you want maximum opening width, continuous interior space, and a clean modern appearance. Both methods can be strong when the joints and back are executed accurately.
Use cabinet-grade plywood for stable, durable boxes. Melamine or other laminated panels cut cleanly and wipe easily, but exposed edges need matching tape or edging. Solid wood suits face frames, doors, and edge details more than wide carcass panels, which can expand and contract across their grain.
Dados and rabbets provide mechanical resistance and help parts register during assembly. Confirmat screws, pocket screws, dowels, biscuits, or simple butt joints can also work when paired with adequate glue surface and accurate fastening. Predrill near panel edges to prevent splitting.
Use a 1/4-inch back in a rabbet or groove when you need a clean exterior and reliable squaring. An applied back can be stronger and simpler, but it increases the finished depth. Nail or screw the back only after checking the diagonals. A thin back is not merely a closure; it is a major anti-racking panel.
Cut shelves after the box is assembled whenever possible. Measure the actual opening, account for shelf hardware, and ease the front edge. This prevents a small cutting error from becoming a visible gap.
Build Your Own Cabinet: Dry-Fit, Glue, Fasten, and Square
To build your own cabinet, assemble one box at a time on a flat work surface. Label every part and keep the best edge toward the visible front.
- Machine the parts. Cut panels square, then rout or dado the planned joints. Drill shelf-pin holes with a guide so opposing rows remain level and evenly spaced.
- Dry-fit the carcass. Assemble the sides, top, bottom, stretchers, and back without glue. Check that the parts seat fully and that the doors, drawers, and appliances will have the required clearances.
- Apply glue sparingly. Brush an even coat inside dados, rabbets, or butt joints. Avoid squeeze-out on visible surfaces and inside shelf-pin holes.
- Fasten in sequence. Clamp the bottom between the sides, then install the top and stretchers. Drive screws through predrilled holes or use the selected joinery. Keep fronts flush and check each joint as you go.
- Check diagonal-square. Measure from the upper left corner to the lower right, then reverse the measurement. If the numbers differ, push the longer diagonal until both measurements match.
- Install the back. Hold the carcass square with clamps or a temporary brace, then fasten the back from one corner across the panel. Recheck both diagonals before completing the fasteners.
- Test the result. Set the box on a flat surface and check for rocking, twisted corners, proud edges, and a level shelf. Correct problems before adding doors, drawers, or neighboring units.
Use glue compatible with the materials. Plywood edges accept woodworking glue, while some laminated panels require a manufacturer-approved adhesive or mechanical fasteners. Remove squeeze-out while it is rubbery, not after it hardens on the finish.
Built-In Cabinetry: Toe Kicks, Nailers, Fillers, Scribes, and Applied Ends
Built-in cabinetry must fit the room, not just the drawing. Mark the highest floor point and the wall-stud locations before setting the first unit.
A toe kick is the recessed platform beneath a base cabinet. Build it as a separate ladder base or notch the cabinet sides, then make every adjoining unit share the same height and setback. Keep plumbing, heating, and appliance clearances in the toe-kick plan.
Nailers are solid strips inside the top, back, or sides of a cabinet. They give you dependable screw locations for wall attachment, countertops, or adjoining panels. Place them where fasteners can reach studs or approved blocking without damaging interior hardware.
Set the first cabinet on the toe kick, then level it from front to back and side to side. Insert shims at structural points, not only at thin cabinet edges. Screw through the nailers into studs, checking plumb after each fastener. Trim or score shims flush once the unit is secure.
For cabinet-to-cabinet installation, clamp neighboring units together with their fronts, tops, and bottoms aligned. Predrill through the cabinet side near hinges or drawer hardware, then use appropriately sized screws. Do not overtighten, or the panels may bow and spoil the alignment.
Fillers close planned gaps beside walls, corners, and appliances. Scribes are narrow strips or shaped edges trimmed to follow an uneven wall or floor. Scribe by holding the filler in its final position, transferring the widest gap with a compass, cutting to the line, and test-fitting repeatedly.
Applied ends cover exposed cabinet sides with plywood, finished panels, or matching door material. Install them after leveling and joining the boxes so the finished face remains flush. Check the complete run for a straight sightline before fitting doors and drawer fronts.