
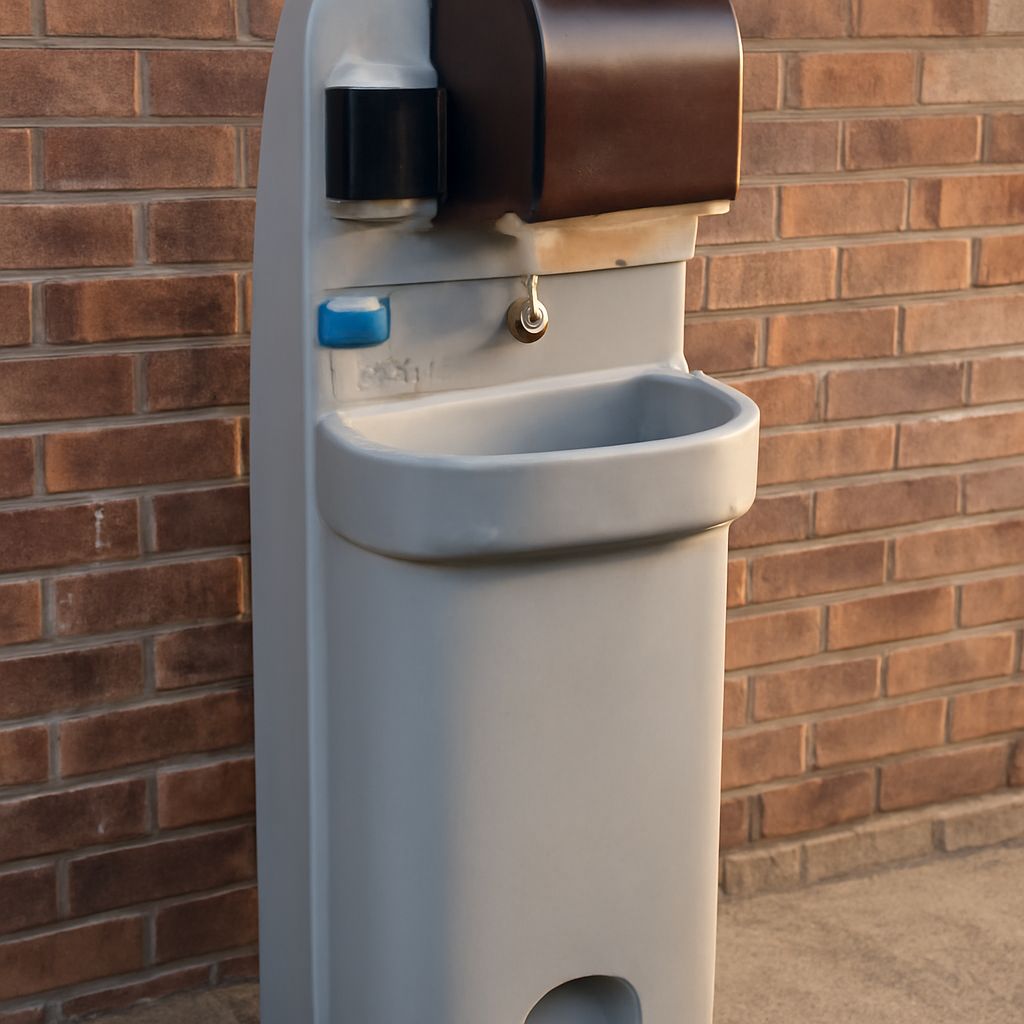
A handwashing station should provide potable water, controlled flow, soap, a basin, drying supplies, and a contained wastewater route. For an event, workplace, construction area, or temporary site, choose the design according to user volume, available utilities, refill access, and servicing capacity.
Plumbed stations suit permanent, high-demand locations. Self-contained and portable handwashing station designs work where water and drainage connections are unavailable. Gravity-fed and foot-pump models offer simpler temporary installation, but their capacity and flow control require closer planning.
Handwashing Station Types: Plumbed, Self-Contained, Gravity-Fed, and Foot-Pump
Each station type solves a different supply, drainage, and traffic problem. Compare the following features before selecting equipment.
- Plumbed stations: These connect to a potable water line and a suitable wastewater drain. They can support continuous use and frequent servicing, making them appropriate for workplaces, permanent facilities, and busy venues. Confirm pressure, pipe connections, drainage capacity, freeze protection, and local installation requirements before setup.
- Self-contained stations: These include a fresh-water tank, basin, soap dispenser, drying area, and wastewater tank in one unit. They provide a practical middle ground for events and temporary workplaces. Refilling and wastewater removal remain necessary, but no fixed water or drain connection is required.
- Gravity-fed stations: A raised clean-water container feeds a basin through a valve or spigot. This design is inexpensive and easy to transport, but it may offer lower flow and less precise control. Secure the tank, protect the outlet from contamination, and provide a separate wastewater container.
- Foot-pump stations: A foot pedal activates the water flow without requiring users to touch a tap. They are useful in temporary sites where touch reduction and straightforward operation matter. Inspect the pedal, tubing, valve, and fittings regularly because mechanical failures can stop water delivery.
- Multi-user stations: These provide two or more basins or dispensing points from a larger supply and waste system. They reduce queues at festivals, workplaces, and meal-service areas. Select them only when the site can handle higher refill, cleaning, and wastewater-collection demands.
A sanitizer stand is not a substitute for a physical handwashing station. Sanitizer may support hand hygiene where appropriate, but it does not provide the basin, water, soap, rinsing, and wastewater controls required for handwashing.
Size Potable Water and Wastewater Capacity for Single- and Multi-User Demand
Start with expected users, handwashing frequency, and the operating period between service visits. A practical planning allowance is about 0.5 gallons, or 1.9 liters, of water per wash when the station uses a controlled flow. Add 20% to 30% for delays, extra rinsing, spills, and unusually heavy use.
Use this calculation:
Required fresh water = users × expected washes per user × 1.9 liters × 1.2 to 1.3
For example, 100 users making two washes during an event require approximately 380 liters before the reserve is added. A lower-flow design may use less, while a running tap or long wash time may use more. Base the final tank size on the actual dispenser and pump settings rather than relying on a nominal tank label.
Wastewater capacity should match or exceed the expected water use. A 20-liter wastewater tank is not adequate for 20 liters of fresh water if the tank needs space to prevent overflow. Choose a waste container with at least 10% to 20% spare capacity, or schedule a mid-period emptying service.
- Single-user or low-demand setup: A compact fresh tank and separate waste container may be sufficient for a short shift or small work crew.
- Event setup: Use larger tanks or multiple stations when attendance is concentrated into short periods. Queue length and peak demand matter more than total attendance.
- Workplace setup: Size for the largest shift and the longest interval between service visits. Include weekends, overnight periods, or restricted vehicle access in the refill plan.
- Multi-user setup: Calculate demand across all basins, then confirm that the supply pump, wastewater outlet, and service route can support simultaneous use.
Choose a Hand Wash Station for Controlled Flow, User Height, and Placement
A hand wash station should deliver enough water for wetting, soaping, rinsing, and shutting off without creating unnecessary waste. A push button, foot pedal, spring-return tap, or metered valve can control flow. Test the duration and volume of one cycle, then use that measurement in the capacity calculation.
Place the station on firm, level ground near the point where handwashing is needed. Suitable locations include entrances, food-service areas, restrooms without nearby sinks, worksite access points, and exit routes. Keep the unit clear of vehicle paths, loose gravel, standing water, and door swings. Leave enough space for users to approach, turn, and dispose of towels without blocking a walkway.
Check the refill path before delivery. Staff should be able to reach the clean-water fill point with a potable-water container or hose, and they should be able to remove the wastewater container without crossing a queue. Protect hoses from trip hazards and keep the fresh-water connection physically separate from the waste outlet.
Set the basin and controls at a comfortable height for the main users. Provide accessible reach and clear knee or foot space where required. A child-focused event may need a lower basin or a stable step platform, while an industrial site may need a stronger unit with controls usable by gloved workers. The station must not wobble when a user presses a button or pedal.
Specify the Basin, Soap, Drying, Splash Control, and Stability
Specify the complete station rather than ordering only a tank and tap. The basin should be deep enough to limit splash and shaped to direct water toward the drain. A smooth, nonporous surface simplifies cleaning. Confirm that the drain cannot detach during transport and that wastewater flows into the intended container without pooling beneath the unit.
- Potable supply: Use a clearly identified clean-water tank, hose, or plumbing connection. Include a secure cap and a fill opening that staff can clean.
- Controlled flow: Select a tap, push button, or foot pump that shuts off reliably. A continuous uncontrolled stream increases water and wastewater demand.
- Soap: Provide liquid hand soap in a pump or sealed dispenser. Mount it within easy reach without placing it where splashing contaminates the nozzle.
- Drying: Supply a towel dispenser, paper towels, or an air dryer suited to the available power and servicing plan. Keep used towels away from the clean-water tank.
- Splash control: Use a raised rear guard, basin rim, drain screen, or splashback where users may wet nearby walls, food areas, or walkways.
- Stability: Choose a wide base, locking casters, leveling feet, or an approved anchoring method. A full tank can be heavy, but it should not shift during use.
Plan how often staff will replace soap and towels, wipe touch points, remove visible debris, and empty wastewater. High-traffic stations may need checks every few hours; low-use units still need inspection at each shift change and after transport.
Set Up a Portable Handwashing Station: Fill, Prime, Test, Clean, and Shut Down
Use this sequence for a portable handwashing station before opening it to users:
- Position the unit: Set it on level, stable ground. Confirm clear access, safe hose routing, adequate lighting, and separation from vehicle or equipment traffic.
- Fill the supply: Add potable water through the designated fill point. Close and secure the cap. Do not connect a clean-water hose to a wastewater fitting.
- Install wastewater capture: Connect the drain hose or place the waste tank beneath the outlet. Secure the connection and leave reserve capacity for the planned service interval.
- Prime the system: Operate the tap, button, or foot pump until water flows steadily. Remove air from the line, then confirm that the valve shuts off without dripping.
- Test for leaks and drainage: Run several wash cycles. Inspect the tank, tubing, basin, fittings, and floor for leaks. Water should drain promptly without backing up or splashing over the basin.
- Load supplies: Fill the soap dispenser and stock drying materials. Test the dispenser with clean hands, and check that users can reach every control without leaning across the basin.
- Service during use: Check water level, wastewater level, soap, towels, basin cleanliness, splash, and stability at the planned frequency. Empty wastewater before it reaches its safe limit and refill before supply stops.
- Clean after use: Remove remaining soap and debris, wash the basin and touch points with the approved cleaning method, and inspect the drain and waste container. Clean and dry tanks before storage when the equipment design permits.
- Shut down: Stop the water supply, drain lines if freezing or transport is possible, empty wastewater, secure loose parts, and close all tank openings. Record damage or needed repairs before the next deployment.
A successful setup has steady controlled flow, no leaks, rapid drainage, accessible soap and drying supplies, and a wastewater container that remains below its service limit throughout operation.