
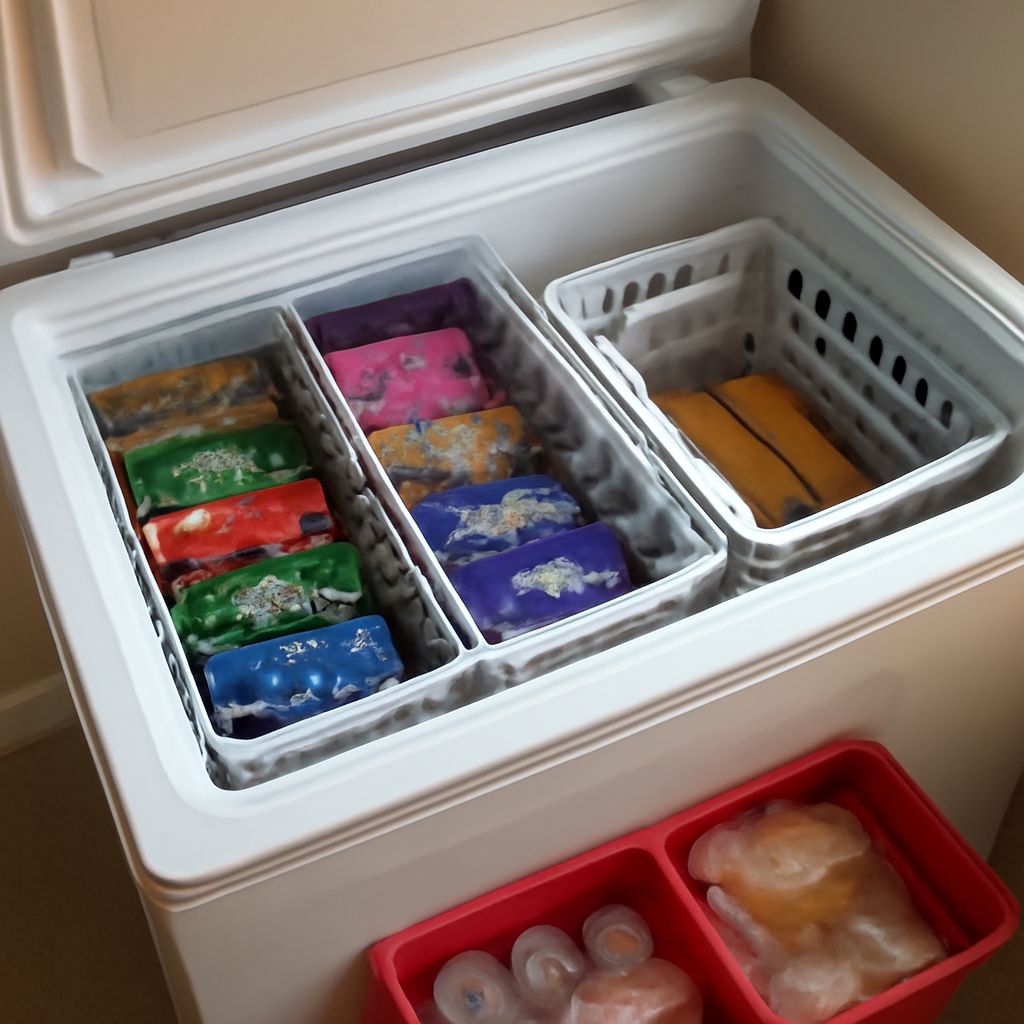
The best chest freezer organizer is removable, easy to lift, and sized around the freezer’s actual shape. Build vertical groups and lift-out layers so you can reach bottom food without unpacking the entire freezer.
Before buying bins, measure the usable interior. Then sort food into labeled zones, create a simple freezer map, and rotate items using first-in-first-out inventory.
Measure for a Chest Freezer Organizer: Upper Baskets, Compressor Hump, Bottom Footprint, Wall Taper, Lid, Drain, and Vent Clearances
Measure the freezer empty, not just from the manufacturer’s outside dimensions. Interior walls often taper, and the compressor hump can reduce the usable floor area.
- Upper baskets: Measure each basket’s length, width, depth, handle clearance, and distance from the open lid. Record whether it slides, hangs, or lifts out.
- Compressor hump: Measure the hump’s height, length, and width. Note the remaining flat areas beside and behind it.
- Bottom footprint: Measure the floor in sections if the hump divides it. Record the narrowest usable width rather than the widest point.
- Wall taper: Measure the interior width near the top, middle, and bottom. A bin that fits at the rim may become wedged lower down.
- Lid clearance: Open the lid fully and measure the clear height above baskets and bins. Leave room for hinges, handles, baskets, and any interior light.
- Drain: Locate the drain plug or drain opening. Keep it visible and accessible for cleaning and defrosting.
- Vents: Identify interior vents and leave the manufacturer’s required clearance around them. Do not cover vents with bags, bins, or labels.
Write the measurements in a simple diagram. Include the narrowest passage from the top opening to the bottom. That passage determines the maximum organizer width and prevents a full bin from becoming impossible to remove.
Choose a Deep Freezer Organizer with Lift-Out Bins, Bags, Dividers, and Airflow Gaps
A useful deep freezer organizer creates removable categories rather than permanent packed layers. Choose several smaller containers instead of one oversized box. Each group should be light enough to lift out safely when full.
- Open baskets: Use rigid, ventilated baskets for frequently used items such as vegetables, breakfast foods, or ice cream. Handles make them suitable for upper and middle layers.
- Solid bins: Use stackable bins for flat packages, meat portions, or oddly shaped bags. Select straight-sided bins that do not lock together permanently.
- Freezer bags: Flatten bags into uniform shapes, press out excess air, and freeze them flat. Store them vertically like files once solid.
- Dividers: Add removable dividers inside baskets for smaller groups. Avoid fixed compartments that prevent the container from being lifted out.
- Labels: Label the short end and top of each bin. Use freezer-safe adhesive labels or a marker that remains readable when cold and damp.
Keep a small gap around vents and avoid pressing food tightly against the walls. Leave enough space for cold air to circulate and for containers to slide upward. Stack only stable, liftable layers. The bottom layer should remain accessible by removing one complete basket or bin, not by digging through loose packages.
Use the compressor hump for short, stable items only if it does not cover a vent or prevent the basket above it from lifting. Never use the hump as a place to bury food that needs frequent access.
Assign Zones and Labels for Chest Freezer Organization
Effective chest freezer organization depends on zones that match how your household uses food. Assign each zone a category, container, and position before loading the freezer.
- Top or front: Place daily-use foods, opened packages, prepared meals, and items approaching their use-by date.
- Upper baskets: Store small, frequently handled foods such as bread, vegetables, fruit, and breakfast portions.
- Middle lift-out bins: Group proteins, meal components, or bulk packages by type.
- Bottom: Store long-term, clearly dated reserves. Keep these in removable bins rather than loose piles.
- Compressor-hump area: Use for compact items or backup packages that do not need frequent access.
Give each bin a short name, such as “chicken,” “ready meals,” or “fruit.” Add the food name, quantity, and freeze date to individual packages. For prepared food, include serving size or reheating instructions. Use large, contrasting labels because frost and low light make small writing difficult to read.
Keep similar foods together, but do not combine packages with different dates if doing so makes rotation unclear. A half-full bin is preferable to a crowded container that cannot be lifted.
Reset Before Organizing a Chest Freezer: Empty, Group, Date, Container, Defrost, and Stack
Use this reset sequence when the freezer becomes difficult to search. Work quickly, and keep frozen food in insulated coolers or another freezer while the interior is being cleaned.
- Empty: Remove every package, basket, divider, and loose piece of ice. Discard leaking, unidentifiable, or badly freezer-burned food according to your household’s food-safety rules.
- Group: Sort food by category, such as meat, vegetables, fruit, prepared meals, baking ingredients, and long-term reserves. Make a separate group for food that should be used soon.
- Date: Read existing dates and add a clear freeze date to anything missing one. If the date is unknown, mark it “use first” rather than hiding it in long-term storage.
- Defrost: Unplug the freezer if the manual permits it, protect the floor, and allow ice to melt naturally. Remove meltwater through the drain. Never chip ice with a sharp tool or use heat that could damage the freezer.
- Container: Wipe the interior dry, then place each category in a labeled basket, bin, or uniform freezer bag. Remove excess air from bags and seal them completely.
- Stack: Put older food in front of newer food within each container. Create lift-out layers, keeping heavy items low and leaving vent and wall gaps clear.
- Map: Sketch the freezer from above and list the category assigned to each basket, bin, and floor section. Keep the map on the lid or nearby.
A successful reset leaves no unidentified package, no blocked drain, and no container wedged beneath another. If you must unload several layers to reach one item, reduce container size or move that category to an upper zone.
Rotate Frozen Food with a Map, First-In-First-Out, and Recurring Inventory
Use the freezer map while putting food away and when retrieving it. The map does not need to list every package; it should show where each category lives and which bin contains older food.
Apply first-in-first-out rotation within every category. Put new packages behind or beneath older ones only when the older items remain reachable. When a bin is nearly empty, pull it forward, consolidate its contents, and refill it with newly frozen food at the back.
- Weekly check: Return misplaced packages, face labels upward, and move thawing or recently opened items to the use-first area.
- Monthly inventory: Count major categories and update quantities on a paper list, phone note, or freezer spreadsheet. Record low-stock items and food that has been overlooked.
- Seasonal reset: Inspect dates, clean spills, check seals, and confirm that vents, the drain, and the lid path remain clear.
- After bulk shopping: Date everything before loading it. Freeze flat packages first, then file them vertically after they are solid.
Keep inventory simple enough to maintain. A dated label, visible zone, and quick recurring check will outperform a detailed list that is never updated.