
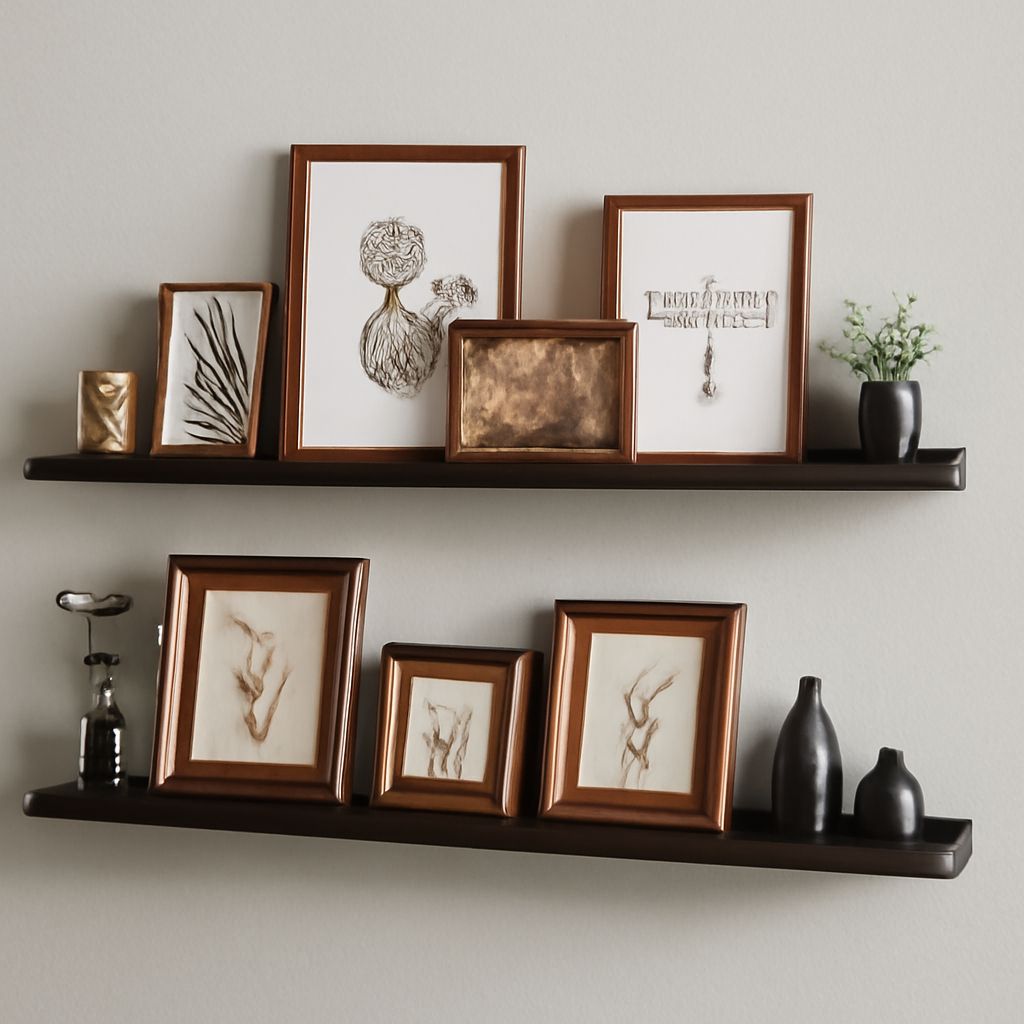
A picture ledge shelf makes framed art easy to rearrange without adding new wall holes. Choose its depth, lip, length, and mounting position together so frames sit securely and look balanced.
For most displays, select a ledge 4–6 inches deep, with a ½–1-inch front lip, then fasten it to studs or properly rated anchors. The right dimensions depend on frame thickness, wall length, and the total load you plan to display.
Choose a Picture Ledge Shelf by Depth and Lip
Start with the objects you plan to display. Shelf depth is the front-to-back measurement, while projection is how far the installed shelf extends from the wall. A shallow 2½–3½-inch ledge suits small frames and photographs. A 4–6-inch picture ledge shelf gives standard frames more stability and leaves room for small objects.
- Check the usable groove. If the ledge has a routed channel, measure its opening and depth. The channel must accept the bottom edge of your frame without forcing it forward.
- Check the lip height. A ½–1-inch lip should retain frames while leaving most of each image visible. A low lip looks lighter but offers less protection from slipping.
- Compare frame thickness. Thin poster frames may sit loosely in a deep groove. Thick wood frames may not seat fully. Test one frame before buying several ledges.
- Account for projection. Include the ledge depth, the frame angle, and any objects placed in front when measuring clearance above furniture or walkways.
Look for a solid back, a straight shelf, and mounting hardware that matches its length. A long shelf carrying several glass-fronted frames weighs much more than an empty shelf. Add the approximate weight of every frame and object, then keep the total below the manufacturer’s stated working load. When no rating is provided, choose a sturdier product and use more wall fasteners rather than relying on a single pair of screws.
Set Length and Height for a Picture Shelf
Measure the wall before selecting a picture shelf. Leave 2–4 inches of wall beyond each end when the shelf stands alone. This clearance keeps the display from appearing wedged into the corners. For a shelf above furniture, keep the ledge narrower than the furniture when possible, or align one end with a deliberate architectural feature.
Calculate usable display length by adding frame widths, planned gaps, and end clearances. For example, four 7-inch frames, three 2-inch gaps, and 2-inch end clearances require 36 inches. Allow extra room if you plan to overlap frames or add objects.
- Set a single ledge so its visual center aligns with the furniture or wall area below.
- For a group at eye level, place the center of the overall frame arrangement about 57–60 inches above the floor.
- Above a console or cabinet, leave roughly 6–10 inches between the furniture top and the ledge’s lowest edge.
- For multiple ledges, mark one consistent mounting line and use a laser level to maintain long-run alignment.
Measure from the floor to the shelf’s top, bottom, or cleat line consistently. The mounting line is not always the visible top edge. Follow the hardware template, then transfer that measurement to the wall so every shelf lands at the intended height.
Install the Shelf Ledge Level and Securely
Gather a tape measure, level, pencil, stud finder, drill, suitable drill bits, and fasteners. Use the shelf’s supplied hardware when it is rated for the wall type and expected load. Otherwise, select screws for studs, masonry plugs for masonry, or heavy-duty hollow-wall anchors for drywall.
- Locate the structure. Scan for studs, pipes, and wiring. Mark every stud that intersects the shelf’s back rail or cleat. A long ledge should use several attachment points, not just the two ends.
- Mark the mounting line. Measure from nearby furniture or the floor, then draw a light level line. Hold the cleat or bracket against it and mark each hole.
- Drill the pilot holes. Drill into studs with a bit smaller than the screw shaft. For drywall or masonry, drill the size specified for the chosen anchor and remove loose dust.
- Attach the cleat or brackets. Drive screws firmly without crushing drywall or stripping the hole. Use a washer where the hardware requires one. For a long run, keep each support on the same plane so the shelf does not twist.
- Fit and test the ledge. Set the shelf onto its cleat or brackets, secure any locking screws, and check it from several angles. It should not rock, bow, pull away from the wall, or tilt when lightly pressed.
Distribute weight across the entire shelf rather than concentrating heavy frames in the middle. Keep dense objects low and toward supported sections. If the shelf flexes, the fasteners move, or the wall surface cracks, remove the load and correct the support before styling it.
Arrange a Picture Frame Shelf Display
Build the arrangement from largest to smallest. Place the tallest or widest frame toward the back, then layer shorter frames in front. Overlap neighboring frames by about 1–3 inches, keeping faces, captions, and important image edges visible. This creates depth without requiring identical frames.
- One ledge: Center a large frame, then balance it with two or three smaller frames. A slightly off-center anchor can look natural when a small vase or object balances the opposite side.
- Open spacing: Leave about 1–2 inches between unoverlapped frames. Use wider gaps between distinct groups so the display does not become one crowded strip.
- Stacked ledges: Align the shelves at their ends for a tailored look, or offset them slightly for a less formal arrangement. Leave enough vertical space for the lower row’s tallest frame and the upper row’s bottom edge.
- Small objects: Add one to three lightweight objects, such as a narrow vase, candleholder, or small sculpture. Keep each item fully supported by the shelf depth and protected by the lip.
Use related frame colors or mat tones to connect different sizes. Keep the heaviest visual pieces near the center or directly over strong supports. Step back after each addition; if a frame hides another image or touches its neighbor, remove an item before adding another.
Plan Seasonal Changes with a Photo Ledge Shelf
A photo ledge shelf is easiest to refresh when the largest frames stay in place and smaller front layers change. Choose a few permanent anchor frames, then reserve the front row for family photographs, seasonal prints, cards, or lightweight decorations.
- Photograph the arrangement before removing it, especially when several frames overlap.
- Store seasonal pieces by shelf position so the next change requires less trial and error.
- Keep replacement frames within the original depth and weight limits. Do not place a thick or heavy frame in a groove that was sized for a slim one.
For frequent changes, use fewer overlapping pieces and leave a clear 1–2-inch handling gap near one end. Treat the shelf ledge as a display surface, not a storage ledge, so every frame remains visible, supported, and easy to remove.