
To learn how to build a drawer, start with the cabinet opening and slide instructions—not a guessed box size. The opening determines the available width and height; the chosen slide determines clearance and usable depth. This method produces a square box that fits before you attach a decorative front.
Use straight, flat plywood or solid boards, a tape measure, square, saw, drill, clamps, wood glue, sandpaper, and the selected slides. Verify every measurement against the actual material, because nominal 1/2-inch plywood may measure closer to 15/32 inch.
How to Build a Drawer Box: Measure the Opening, Deduct Slide-Type Clearance, and Set Depth
Measure the opening at the front, middle, and back. Record the smallest width and height. Also measure the cabinet’s usable interior depth, from the front mounting surface to any hinge, back panel, or obstruction.
Calculate the drawer box’s outside width from the slide specification:
- Side-mount slides: subtract the required clearance from both sides. Many ball-bearing models require 1/2 inch per side, producing a 1-inch total deduction, but use the supplied specification rather than assuming it.
- Undermount or concealed slides: follow the manufacturer’s required drawer width, side clearance, and bottom requirements. These systems often use a different deduction than side-mount hardware.
- Center-mount slides: allow the clearance specified for that particular runner. The box may be centered differently and may need a special bottom channel.
For example, a 24-inch opening with side-mount slides requiring 1/2 inch per side produces a 23-inch outside box width. That same opening paired with concealed slides may require another width entirely.
Choose a slide length that fits the cabinet depth. Set the box depth to the slide maker’s recommended drawer length, usually leaving some rear clearance. Do not make the box deeper than the slide can support or the cabinet can accept.
Set the side height below the opening height so the box can travel freely. Allow the running clearance stated by the slide instructions, plus room for the front alignment. A drawer front can be taller than the box sides, especially on an overlay drawer.
Building a Drawer: Choose Material Thickness, Side Height, Joint, and Bottom
The key decisions in building a drawer are material thickness, joint style, and bottom construction. For a beginner-friendly box, use 1/2-inch plywood with glued butt joints. It is stable, easy to cut, and strong enough for ordinary household storage.
Use this layout when the front and back fit between the two side pieces:
- Two sides: the calculated box depth by the chosen side height.
- Front and back: the calculated outside box width minus twice the actual side thickness, by the chosen side height.
- Bottom: sized according to whether it sits in a groove or attaches beneath the box.
For a stronger appearance, use a rabbet, dado, or pocket screws, but keep the joint consistent on all four corners. The simplest way to build a drawer is to make the front and back equal in length, make both sides equal in length, and confirm the bottom fits before applying glue.
A grooved bottom uses a 1/4-inch plywood panel captured in a groove cut near the lower edge of each side, front, and back. This keeps the bottom flush or nearly flush with the box and prevents it from hanging below the drawer.
An applied bottom is easier to make. Cut 1/4- or 1/2-inch plywood to the box’s outside dimensions, then glue and screw it to the underside after the box is assembled. It adds strength but also adds thickness, so check that the slides and cabinet opening still provide enough clearance.
Build a Drawer Box: Make the Cut List, Then Dry-Fit, Glue, Clamp, Square, Sand, and Finish
Label every piece before cutting. Cut the two sides first, then cut the front and back to the calculated length. If you are using a grooved bottom, cut all grooves before assembly and keep them at identical heights.
- Dry-fit the box. Place the pieces together without glue. Check that the corners meet fully, the bottom enters each groove, and the box matches the planned outside dimensions.
- Check the cuts. Measure both diagonals across the dry-fitted box. Equal diagonal measurements indicate a square layout. If they differ, correct the cut or joint before assembly.
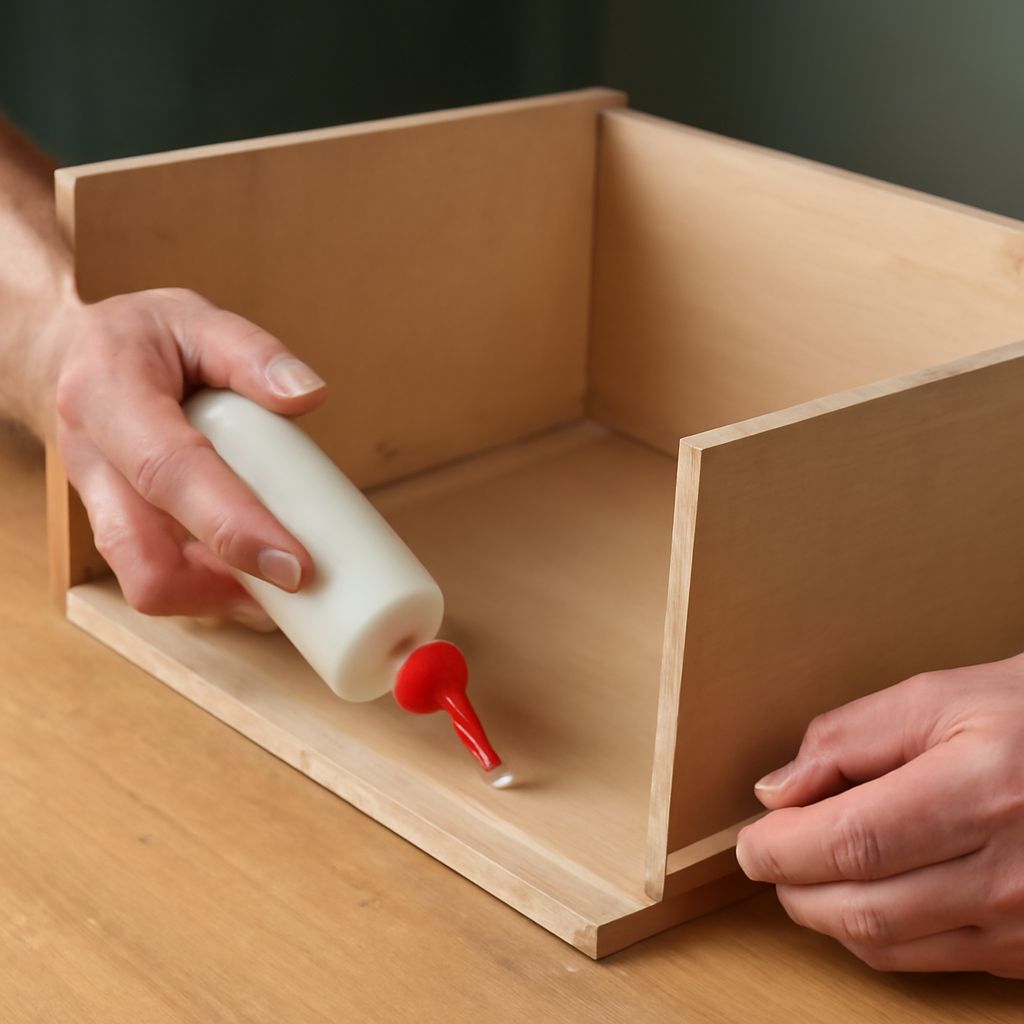
- Glue the joints. Apply a thin, even coat to the mating edges. Avoid squeezing excessive glue into a bottom groove if the panel needs slight movement.
- Clamp and square the box. Use bar clamps or a drawer clamp. Recheck both diagonals, then measure the width at the front and back before the glue sets.
- Install the bottom. Slide a grooved panel into position during assembly, or attach an applied panel after the box has cured. Predrill screws to prevent plywood splitting.
- Sand and finish. Ease sharp edges with 120- or 150-grit paper, then sand visible surfaces to 180 grit. Remove dust before applying paint, clear finish, or stain.
Do not continue if the box rocks, twists, or has visibly uneven corners. A slide can hide a small measurement error, but it cannot reliably correct a badly out-of-square box.
DIY Storage Drawers: Install a Grooved or Applied Bottom and Mount Slides
For DIY storage drawers, mount the cabinet members first. Follow the slide template or instructions for setback from the cabinet front. Use a level and a spacer block so both sides sit at the same height and distance from the opening.
Attach each cabinet member with the recommended screws, then measure between them. Their spacing must match the box width and the slide’s required clearance. Predrill near plywood edges and tighten screws firmly without stripping them.
Attach the drawer members to the box sides using the slide’s stated setback. Keep them parallel to the bottom and at equal heights. For undermount hardware, install the required locking clips, notches, or rear brackets before inserting the drawer.
Insert the empty drawer and perform a fit check. It should travel smoothly, remain level, and close fully without rubbing. Test it several times, then add a moderate load. If movement is stiff, inspect slide parallelism, box width, screw placement, and any proud edge or finish buildup.
How to Make a Drawer Front: Set the Overlay or Inset and Adjust the Fit
If you are learning how to make a drawer, treat the front as a separate fitting piece. The box front provides structure; the drawer front controls the visible gaps and cabinet alignment.
An overlay front covers part of the cabinet face or face frame. Its finished size equals the opening size plus the planned overlap on each side. An inset front sits inside the opening, so its finished size equals the opening minus the desired reveal on each side.
Cut the front slightly oversize only if you can trim it accurately. Sand the edges, then hold it in position with even gaps. A common starting reveal is 1/8 inch, but match the spacing of nearby doors and drawers.
Clamp the front to the installed box and drive screws from inside the drawer. Use short screws that will not penetrate the front. Open and close the drawer, then adjust the slide clips, mounting screws, or front position until the reveals are even, the front sits flush, and the drawer closes completely.