
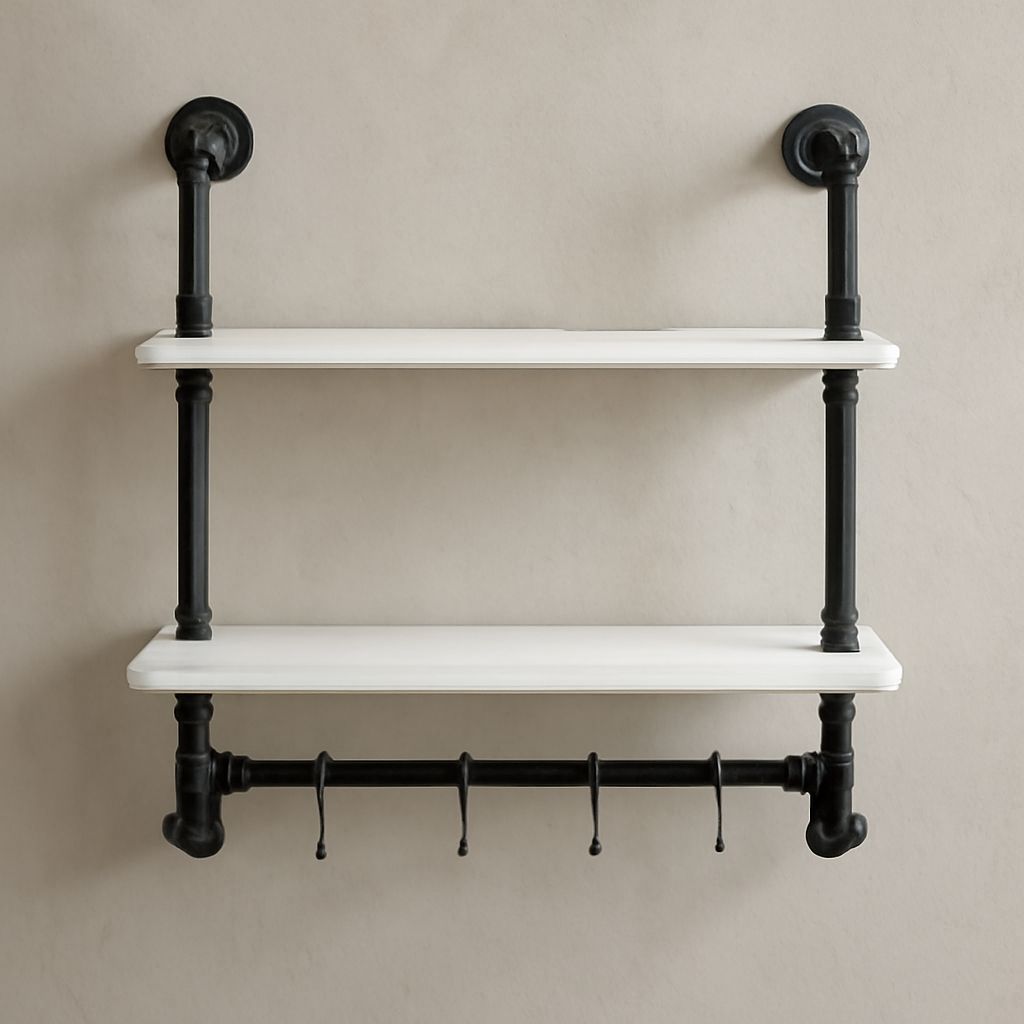
Iron pipe shelves need more than attractive threaded fittings. A stable system depends on shelf span, board depth, pipe diameter, wall structure, correctly placed flanges, and fasteners matched to the substrate.
Steel pipe shelves are usually built with black malleable-iron fittings, threaded steel pipe, wood boards, and structural anchors. Plan the layout first, then dry-fit the parts before cleaning, finishing, mounting, and testing the completed frame.
Choose a layout for iron pipe shelves
Start by drawing the wall elevation. Mark every shelf level, each vertical support, the board length, and the front edge. Keep the design symmetrical unless the wall or contents require otherwise.
- Two-bracket layout: Use one support near each end of a short shelf. This suits light or moderate loads and spans up to about 24 inches when the board is rigid.
- Three-bracket layout: Add a center support for longer boards, heavier objects, or spans around 30 to 36 inches. A center support reduces board sag and shares the load.
- Vertical ladder layout: Build two or more vertical pipe runs at the wall, with tees or elbows creating arms at each shelf level. This gives several shelves a unified frame.
- Individual bracket layout: Give every shelf separate wall flanges, nipples, elbows, and horizontal support arms. It is easier to level and repair than one continuous assembly.
Place supports over wall studs whenever possible. Locate studs with a detector, confirm their centers with small pilot holes, and mark the flange holes. For masonry, identify whether the wall is concrete, brick, or block before selecting anchors. Hollow drywall alone is not a suitable support for a loaded shelf.
Leave enough clearance above each board for the intended items. Measure around trim, outlets, doors, and adjacent cabinets. A deeper board may provide more storage, but it also increases leverage against the wall fasteners. Keep the front edge close to the pipe arms unless the wall and anchors are designed for the extra projection.
Size industrial pipe shelves by span, depth, load, and pipe diameter
Record four separate measurements: board length, board depth, board thickness, and the finished pipe projection from the wall. Do not assume a pipe’s nominal size equals its outside diameter or finished shelf depth.
- Span: Use boards with adequate stiffness for their length. As a practical starting point, limit unsupported wood spans to about 24 inches for ordinary shelving, or add a center bracket as the span approaches 30 to 36 inches.
- Depth: Eight to 12 inches works for books, dishes, and small storage bins. Deeper shelves require stronger boards, larger pipe, closer supports, and more substantial wall anchors.
- Load: Estimate the weight of the contents, board, and fittings together. Distribute items across the shelf instead of concentrating the heaviest load at the front or center.
- Pipe diameter: Three-quarter-inch pipe is a common general-purpose choice. Use one-inch pipe for deeper shelves, longer arms, or heavier service. Half-inch pipe is better reserved for short, lightly loaded shelves.
Use the manufacturer’s rating for the board, pipe, brackets, and anchors, then design around the lowest-rated component. A threaded fitting may be strong in isolation but still fail when the wall fastener pulls out or the board bends.
Prepare a bill of materials for each support position. It may include a wall flange, short nipple, elbow, horizontal nipple or arm, tee for a continuous vertical run, and cap at an exposed pipe end. Add the boards, washers, structural screws or lag screws for studs, and substrate-appropriate masonry anchors where required. Add wood screws, pipe straps, or clamps to keep boards from shifting.
Thread engagement changes the final dimensions. A nipple does not remain its full labeled length after it enters a flange, elbow, or tee. Fittings also stop at different orientations as their threads tighten. Measure the actual dry-assembled projection and shelf height, rather than adding nominal pipe lengths on paper.
Assemble an iron pipe shelf with flanges, nipples, elbows, tees, caps, boards, and finish
- Cut and check the pipe. Use threaded pipe in the required lengths, or have cut pieces threaded. Confirm that every thread is clean, undamaged, and deep enough for secure engagement.
- Dry-fit the frame. Assemble flanges, nipples, elbows, tees, and caps without sealant. Set the parts beside the boards and compare the actual projection, shelf spacing, and fitting orientation with your drawing.
- Mark orientation. Use a pencil or removable marker to identify the top of each fitting and the final direction of every arm. This helps you reproduce the layout after disassembly.
- Clean the metal. Remove factory oil, grit, and loose scale with a suitable degreaser and clean rags. Allow the pipe to dry fully. Wear gloves and provide ventilation when using solvents.
- Apply the finish. Leave black pipe in its industrial appearance only after removing oily residue, then protect it with a compatible clear coat. Alternatively, use metal primer and paint, a durable enamel, or powder coating. Finish boards with paint, stain, oil, or polyurethane, and let all coatings cure before assembly.
- Assemble permanently. Use thread sealant only when the design needs it and follow its cure instructions. Tighten fittings firmly, but do not force a fitting past its useful orientation or damage the threads.
For each shelf, place the board on the horizontal arms and check that it sits flat. Fix it from below with short wood screws, or use pipe straps and clamps that match the pipe diameter. Pre-drill near board edges to reduce splitting, and choose screw lengths that cannot break through the finished top.
Mount an industrial pipe shelf: level, fasten, prevent rotation, and load-test
- Transfer the layout. Mark shelf heights and flange centers on the wall. Check each line with a level, then verify that the marks land on stud centers or approved masonry anchor locations.
- Drill for the substrate. For wood studs, drill pilot holes sized for the structural screws. For concrete, brick, or block, use the anchor manufacturer’s drill size, embedment, edge distance, and installation method. Do not substitute drywall plugs for structural fasteners.
- Fasten every flange. Hold the frame in place, install washers where specified, and drive structural screws or masonry fasteners through the flange holes. Tighten until secure without crushing soft masonry or stripping wood.
- Level each board. Check front-to-back and side-to-side level after tightening. Small fitting adjustments can change the height, so recheck the shelf after every major connection.
- Prevent rotation. Tight threaded parts can still rotate under an uneven load. Use all available flange holes, secure each board to its arms, and add pipe straps, collars, or concealed blocking where the design permits. A continuous rear rail or vertical pipe can also tie brackets together.
- Load gradually. Test the empty shelf first. Add about 25 percent of the intended evenly distributed load, inspect the wall and fittings, then increase to 50 percent and 75 percent in stages. Finish with the planned load only if there is no meaningful deflection, movement, cracking, loosening, or anchor pullout.
Stop immediately if a flange shifts, a fitting turns, the board bows noticeably, or the wall surface cracks. Remove the load, correct the weak connection or support spacing, and repeat the test before using the shelf.