
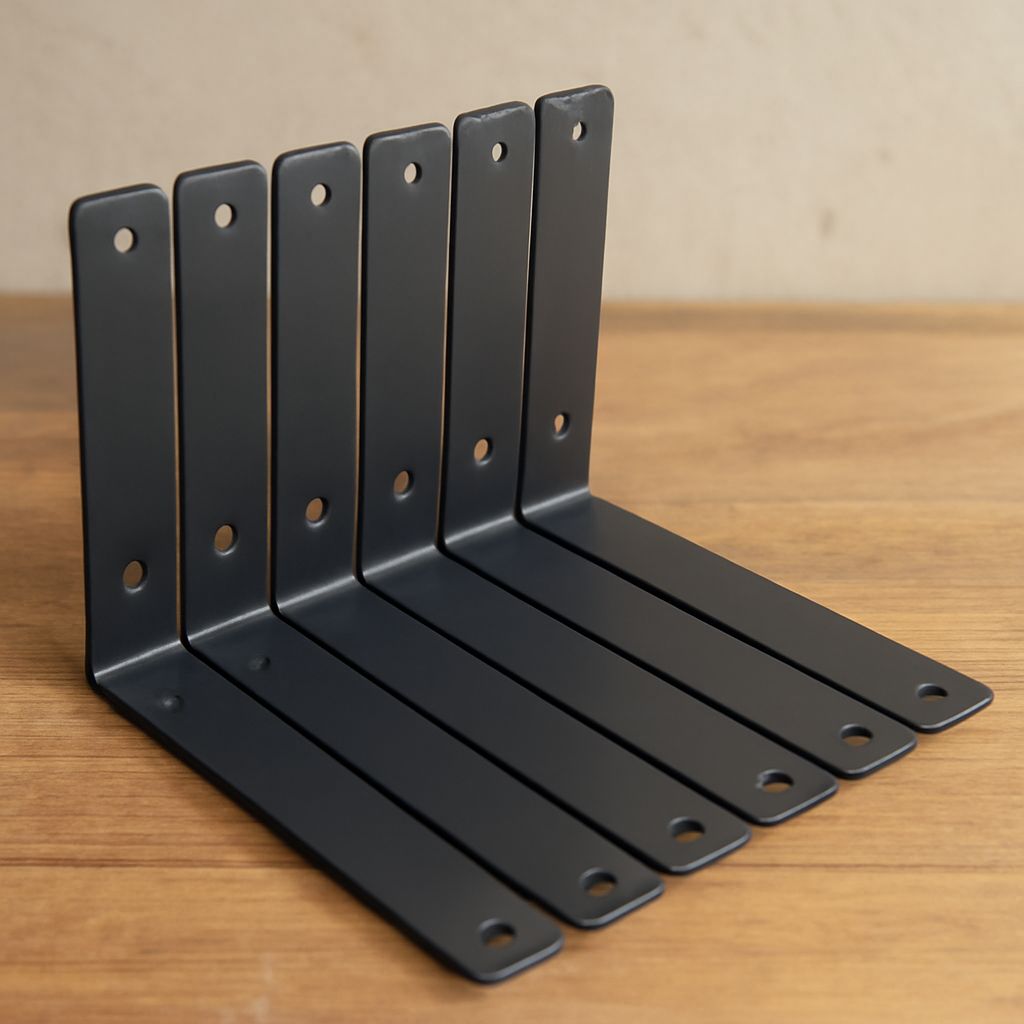
L-shaped shelf brackets work well for wall-mounted shelves when their dimensions, spacing, and fasteners match the shelf and its load. For most timber or engineered-wood shelves, use brackets with a horizontal arm at least two-thirds of the shelf depth, place supports near both ends, and fasten each bracket through a reliable structural path.
The correct design also depends on load position. Books or objects placed near the front edge create more leverage than the same weight spread against the wall. Use a gusseted bracket for heavier loads, keep unsupported spans modest, and attach the shelf to the brackets after the wall fixing has been checked.
L-Shaped Shelf Brackets: Compare Open, Decorative, and Concealed Supports
An open L bracket has a vertical arm against the wall and a horizontal arm beneath the shelf. It is usually the simplest and strongest option because its load transfers directly from the shelf to the wall. Steel or aluminum versions suit utility shelves, workrooms, garages, and heavily loaded book shelves.
Decorative brackets add a visible scroll, curve, or triangular detail. They can support a shelf effectively, but their appearance does not prove their capacity. Check the rated load, metal thickness, screw-hole size, and whether the decorative section is actually structural.
Concealed supports use rods or a hidden frame inserted into the shelf. They create a clean appearance, but they require a sufficiently thick shelf and very accurate drilling. The wall must also provide a strong fixing point. A concealed system is less forgiving than a standard wall shelf bracket if the shelf is thin, deep, or heavily loaded.
For a visible, adjustable installation, choose an open bracket. For a feature shelf carrying light or moderate objects, choose a decorative design with a documented capacity. Use a concealed support only when the shelf construction and wall attachment meet the system requirements.
L Shelf Brackets: Match Arm Length, Gussets, and Overhang
Measure the shelf depth from the wall to its front edge. The horizontal arm of the L shelf brackets should support at least two-thirds of that depth. For a 12-inch shelf, choose an arm of at least 8 inches; use 10 to 12 inches for books, kitchenware, or a front-loaded shelf.
A longer arm reduces the unsupported front portion, but it should not extend beyond the shelf. Recess the bracket slightly from the front edge, usually 1 to 2 inches, unless the design requires another position. Keep the shelf’s front overhang consistent across every bracket.
The vertical arm must provide enough wall contact and screw separation. As a practical starting point, choose a wall leg at least as long as the horizontal leg, especially for deep shelves. A wall plate with two or more vertically separated holes resists twisting better than a short plate with one central screw.
A triangular gusset between the arms makes the bracket stiffer and limits downward deflection. Select gusseted brackets for long shelves, dense materials, or loads placed toward the front. Flat decorative L plates may be suitable for small, lightly loaded shelves, but they are poor substitutes for a brace under substantial leverage.
Also check shelf thickness. Screws used to fix the shelf must be shorter than the shelf thickness after allowing for the bracket metal. The screw head should sit securely in the bracket hole without penetrating the shelf surface.
Shelf Support Bracket Placement: Span, Quantity, and Load Distribution
Support count is determined by shelf length, material, depth, and load. A short shelf carrying light décor may need two brackets. A 72-inch shelf carrying books commonly needs three or four, with closer spacing for heavier loads or flexible materials such as MDF.
- Place the first and last bracket about 3 to 6 inches from each shelf end.
- Keep the clear span between adjacent brackets about 24 to 30 inches for a moderate wood-shelf load.
- Use roughly 16 to 24-inch spacing for heavy books, deep shelves, MDF, or front-loaded objects.
- Add a bracket whenever the planned clear span exceeds the shelf material’s practical limit.
For example, a 48-inch solid-wood shelf may use two brackets near its ends for a light load, while a 72-inch book shelf is better served by four supports at about 18 to 22-inch intervals. Do not rely on a center bracket alone to correct excessive end overhang.
Distribute the load across the full shelf rather than concentrating it at one point. Put the heaviest items close to the wall and directly over or between brackets. A shelf that feels strong under an evenly spread load can sag or pull away when weight is grouped at the front edge.
Make sure bracket positions suit the wall framing. If studs do not line up with the ideal shelf layout, adjust the spacing, use a continuous mounting rail, or install suitable blocking. Do not weaken the support path just to preserve symmetrical bracket positions.
Wall Shelf Bracket Fastening: Studs, Masonry, and Fastener Paths
For a framed wall, fasten each wall shelf bracket into a stud whenever possible. Locate studs with a finder, then confirm their centers with a small probe or pilot hole. Mark the centerline clearly so the screws do not enter only drywall.
Use structural wood screws long enough to pass through the bracket and wall finish, then penetrate the stud by about 1 1/2 inches or as specified for the fixing. Use the upper and lower holes in the vertical plate. Multiple separated fasteners resist both downward force and the forward pull created by a deep shelf.
When studs are unavailable, use load-rated hollow-wall anchors matched to the wall thickness. Heavy shelves should instead be supported by installed blocking or a mounting rail fixed to several studs. Ordinary plastic plugs in drywall are not an adequate fastener path for a loaded shelf.
For concrete or solid brick, use masonry screws or expansion anchors sized for the bracket holes and expected load. Drill into the masonry, not the mortar joint, and follow the anchor’s required hole diameter and embedment. Hollow block, tile, and lightweight masonry need anchors specifically rated for those materials.
Keep every fastener path straight and fully seated. A screw angled through a bracket hole, a stripped anchor, or a screw that bottoms out before clamping the bracket can reduce capacity sharply.
Shelf Hanger Installation: Mark, Level, Fix, and Test
- Plan the layout. Mark shelf height, end overhang, bracket centers, and stud or masonry locations. Check that doors, trim, and nearby fittings will not interfere.
- Establish a level line. Use a spirit level or laser to draw the top or center reference for the bracket plates. Transfer this line to every bracket position rather than measuring down from an uneven ceiling or floor.
- Mark the bracket holes. Hold each bracket on its center mark, confirm that the horizontal arms are parallel, and mark the actual fixing holes. Recheck the planned end spacing and clear spans.
- Drill pilot holes. Drill the correct size for the stud screw or masonry anchor. For hollow-wall anchors, follow the anchor manufacturer’s hole diameter and installation method.
- Fix the brackets. Install the upper and lower wall fasteners loosely first. Check alignment, then tighten them firmly without crushing drywall, deforming the bracket, or stripping the anchor.
- Check level again. Lay the level across the bracket arms and along the full shelf position. Correct small errors before fixing the shelf; do not force a warped shelf to hide an uneven support.
- Secure the shelf. Center it on the brackets, confirm equal front and side overhangs, and drive short screws through the bracket holes into the shelf underside. Stop when the shelf is clamped; overtightening can strip wood or damage composite board.
- Test gradually. Press down gently near each bracket, then add the intended load in stages, starting with the heaviest items near the wall. Stop if the shelf moves, the wall plate lifts, an anchor rotates, screws loosen, or the shelf visibly bends.