
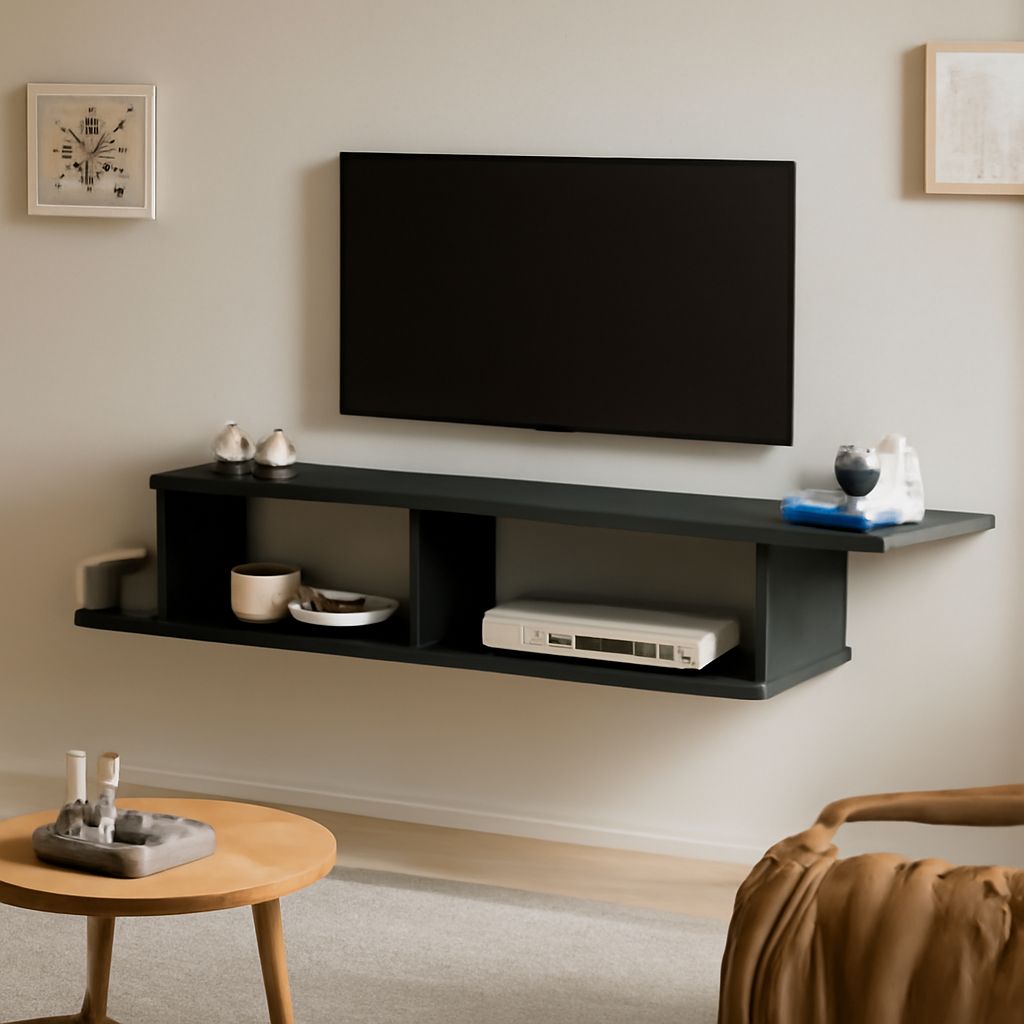
A TV floating shelf should be sized around the equipment, not the screen. Measure each console, streaming box, game system, soundbar, plug bend, cable route, and the shelf’s expected load before choosing a board.
For most setups, allow 2–4 inches of extra width beyond the widest device and enough depth for rear cables to bend without pressing against the wall. Then position the shelf so it preserves the screen, soundbar, remote, outlet, and ventilation clearances.
TV Floating Shelf Dimensions: Measure the Equipment First
Measure width, depth, plug bend, and expected load
Make an inventory before selecting shelf dimensions. Record the width, depth, height, and weight of every device that will sit on or near the shelf. Include the power strip, game controllers, remotes, and decorative items if they will share the space.
- Width: Measure the widest device, then add 2–4 inches of side clearance. This leaves room to lift the device off the shelf and prevents a tight, crowded appearance.
- Depth: Measure from the front of the device to its deepest rear connection. Add the space required for HDMI, power, optical, Ethernet, and antenna cables.
- Plug bend: Measure how far each plug extends behind the device when connected. Straight plugs may need 2 inches; bulky or right-angle adapters can require more.
- Height: Leave enough vertical space to reach buttons, insert discs, and remove devices without hitting the shelf above.
- Load: Add the weight of all equipment, the shelf itself, and expected accessories. Choose a shelf and bracket system rated above that combined load.
A practical shelf formula is: usable width = widest device width + 2–4 inches. For depth, use the device depth plus rear plug clearance, while keeping the front edge accessible. Do not size a shelf from TV width alone. A wide screen can need only a shallow shelf, while a deep console may require a much deeper one.
Mark remote access, ports, outlets, and cable paths
Use painter’s tape to mark the TV, devices, outlets, and proposed shelf edges on the wall. Mark the location of front buttons, disc trays, status lights, and infrared sensors. Open shelves usually preserve remote access, but a shelf lip, soundbar, or side panel can still obstruct a low sensor.
Identify every port before drilling. HDMI and Ethernet cables may exit from the side, bottom, or rear of a device. Note whether the TV’s ports face sideways or directly toward the wall. Plan a route that avoids sharp bends and leaves enough slack to remove equipment later.
Locate the nearest outlet and decide whether cables will drop vertically, pass through a wall channel, or run inside a surface raceway. Keep cable paths separate from bracket holes and avoid trapping cords between the shelf and wall.
Reserve ventilation gaps before choosing shelf dimensions
Heat-producing devices need open space around their vents. Follow each manufacturer’s clearance instructions first. If no measurement is provided, leave at least 2 inches at the sides and top of small streaming devices, with more space around game consoles, receivers, and amplifiers.
Never cover top vents or press a device’s rear vents against the wall. A shelf above a console should leave enough height to remove the device and allow warm air to rise. If several components share one level, separate them rather than stacking hot devices directly together.
Floating Shelves for TV: Choose a Layout
One console shelf: fit the largest device plus clearance
A single console shelf is the simplest arrangement. Center it below the screen when the main device is a streaming box, game console, or cable receiver. Size the shelf for the largest unit, then add side clearance and rear cable depth.
Keep the shelf visually narrower than the TV when the screen is large and the equipment is compact. A shelf that extends slightly beyond the equipment can look balanced, but excess length adds load and can make the wall feel heavy. Place remotes in a small tray at the open front or on a nearby side shelf.
Stacked shelves: separate components and heat-producing gear
Use stacked shelves when you need separate zones for a console, receiver, décor, or controllers. Leave enough vertical clearance for the tallest component plus hand access. A common arrangement places the receiver or console on the lower shelf, with lighter accessories on the upper shelf.
Do not place a heat-producing receiver directly below another device if the upper shelf traps rising air. Offset the shelves slightly or dedicate one level to open display items. Keep each shelf within its individual load rating; the total wall load includes every shelf and bracket.
Side shelves: keep remotes and controllers reachable
Side shelves work well when the wall below the TV is narrow or the center must remain clear for a soundbar. Place them within easy reach of the seating position, but outside the screen’s main sightline.
Use side shelves for remotes, controllers, headphones, and small streaming devices. Keep them far enough from the TV’s edge to avoid bumping the screen or blocking side-facing ports. If a device uses an infrared remote, make sure the sensor faces the seating area without a shelf edge directly in front of it.
Floating shelves under a TV: place them below a soundbar without blocking the screen
For floating shelves under a TV, position the soundbar first. The shelf should sit below the soundbar, not between the soundbar and the screen. Leave roughly 2–4 inches between the soundbar and the screen when the soundbar’s design allows it, then preserve a separate gap below the soundbar for the shelf and cables.
Check the bottom edge of the TV from the main seating position. The shelf, console, and soundbar should not cover the lower image area or obstruct the TV’s remote sensor. If the TV is mounted low, use one shallow shelf below the soundbar rather than adding a second tier that rises into the screen area.
Floating Shelves Near a TV: Protect Sightlines
Set clear screen, soundbar, and remote sightlines
View the wall from the primary seat before fixing shelf height. The screen should remain unobstructed, and the soundbar should project sound toward the room rather than into a shelf or wall. Keep tall décor, plants, and devices below the screen’s lower edge.
Check sightlines from both the center seat and the side seats. A side shelf can be outside the center view but still intrude from an angled seat. Keep remote sensors, game controllers, and frequently used ports reachable without standing or moving the equipment.
Use wall structure and outlet positions to set shelf height
Outlet placement can determine the shelf’s final height. Avoid covering an outlet that must remain accessible, and do not force a power cord into a tight bend behind the shelf. If the outlet sits directly behind a bracket, move the shelf or use a suitable low-profile connection approved for the installation.
Mark studs, blocking, or masonry before choosing the final position. A shelf may need to shift several inches to align with reliable supports. Preserve the screen’s centerline, but prioritize secure anchoring and safe cable routing over perfect visual symmetry.
Floating Entertainment Shelf Installation: Support, Airflow, and Cables
Find studs and choose hardware for the expected load
A floating entertainment shelf carrying electronics needs more support than a display shelf holding lightweight décor. Use a stud finder, confirm stud locations with a small pilot hole, and mark the bracket holes. For masonry, use anchors designed for the specific wall material. Do not rely on drywall anchors alone for a heavily loaded shelf unless their rated capacity and installation match the load.
Compare the bracket rating with the combined shelf, equipment, and accessory weight. Follow the bracket manufacturer’s spacing and fastener requirements. A long shelf may need multiple brackets or a continuous mounting rail to prevent sagging and reduce twisting at the wall.
Leave airflow around every device
Before tightening the shelf, place the equipment in its intended positions and confirm that vents remain open. Keep power adapters from covering ventilation slots. Leave a clear path for warm air to escape, especially above consoles, receivers, and cable boxes.
Test access with the devices powered on. If a component becomes unusually hot, shuts down, or feels cramped during normal use, increase the clearance or move it to a more open shelf.
Route cables, mount the shelf, and test every connection
- Turn off and unplug the equipment. Label each cable so the final reconnection is quick.
- Transfer the taped layout to the wall, then mark bracket holes away from outlets and planned cable routes.
- Install the bracket or rail into confirmed studs, blocking, or correctly rated masonry anchors. Check it for level before loading it.
- Route cables with gentle bends and enough slack to remove each device. Secure them loosely so they do not pull against ports.
- Install the shelf body, confirm that it is fully seated, and check for movement before placing equipment on it.
- Load the heaviest device closest to the wall or over the strongest bracket points. Keep lighter items toward the open edges.
- Reconnect power, HDMI, network, audio, and antenna cables. Test video, sound, remotes, controls, and network access from the seating position.
Finish by checking that the shelf remains level, cables are not pinched, outlets are usable, vents are open, and every device can be removed without dismantling the installation.