
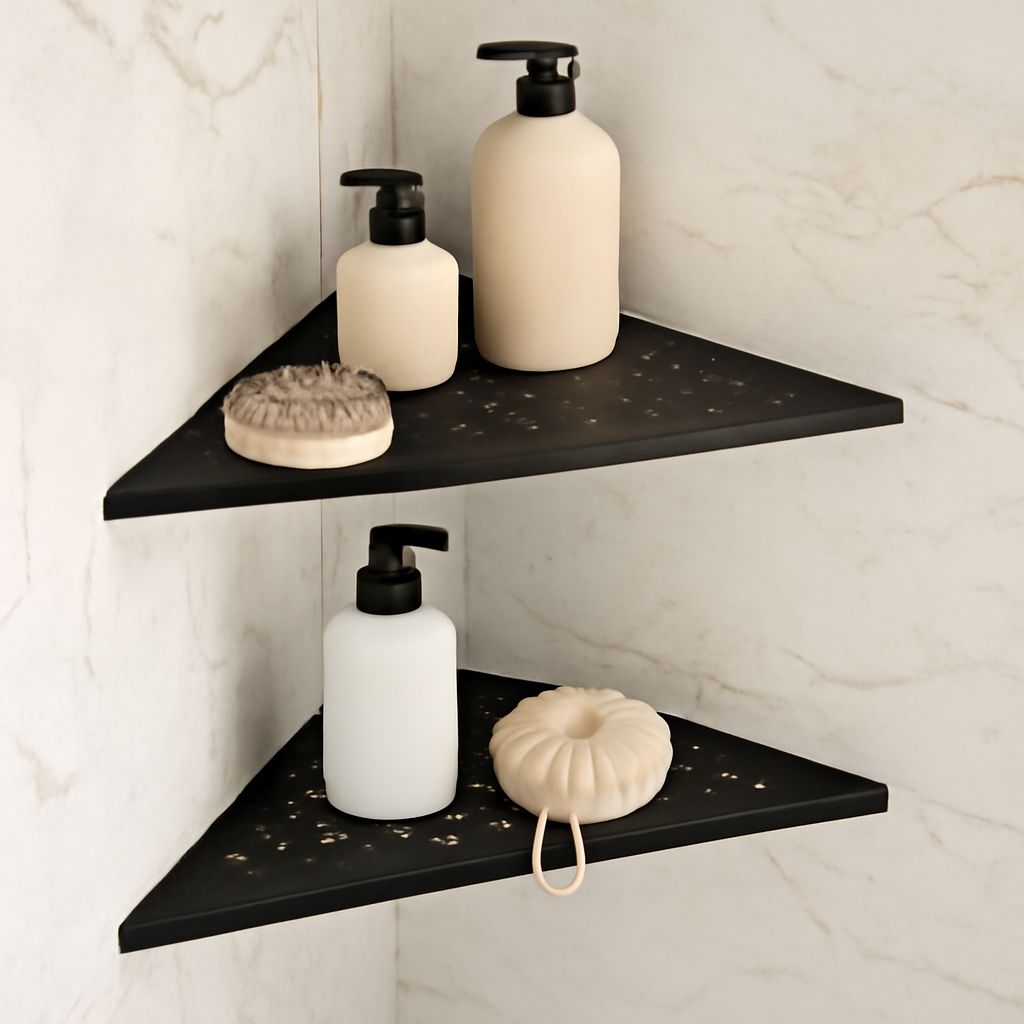
A shower corner shelf is usually best installed while the shower is being tiled. A properly supported tile-in or stone shelf gives the cleanest appearance and avoids later drilling. Choose a retrofit model when the shower is finished, access is limited, or you want to avoid removing tile.
Plan the shelf around three measurements: the user’s reach, the tallest bottle, and the space needed for elbows and cleaning tools. The shelf must also preserve waterproofing, shed water toward the shower, and leave grout and sealant joints serviceable.
Shower corner shelf: built-in vs. retrofit
During-tile options: thinset-supported tile-in and notched stone
A thinset-supported tile-in shelf is installed as the wall tile goes in. A triangular tile, prefabricated insert, or tiled shelf panel fits between the two corner walls. Thinset bonds the shelf to suitable backing, while the surrounding tile and substrate provide support. Follow the shelf manufacturer’s support requirements; thinset alone should not carry an oversized or heavily loaded shelf.
This option offers the most integrated look. You can match the shelf surface to the shower tile, align its front edge with nearby grout lines, and avoid exposed brackets. It also works well for a tile corner shower shelf when the installer can plan the membrane, backing, and tile layout together.
Notched stone shelves are another during-tile option. A slab of marble, granite, quartz, or engineered stone is cut with notches that fit into the corner tile layout. The notches help the shelf lock into position, but the shelf still needs appropriate bearing, bonding, and support. Stone creates a durable, low-grout surface, although porous materials require sealing and more attentive cleaning.
Retrofit options: surface-mounted hardware and adhesive models
Surface-mounted hardware uses brackets, rails, or clips attached to the finished shower walls. It can support glass, metal, stone, or solid-surface shelves and is useful when the shower is already complete. Drilling is the main drawback. Fasteners must enter approved backing, and each penetration needs a compatible sealant detail so water cannot reach the wall assembly.
Adhesive retrofit models bond directly to clean, cured tile. They avoid drilling and are often the simplest choice for a rental, a lightly loaded shelf, or a finished shower where opening the wall is impractical. Confirm that the adhesive is designed for continuous wet conditions. Remove soap film, let the tile dry fully, and respect the stated cure time before loading bottles.
Adhesive shelves are not suitable for every surface or load. Textured tile, dusty grout, natural stone, and uneven corners can reduce bond strength. A tile-mounted shelf, whether drilled or bonded, is not a substitute for the shower’s waterproofing system behind the tile.
Corner shower shelf materials, support, and size
Ceramic, stone, metal, glass, and bonded shelves
Ceramic shelves coordinate easily with ceramic wall tile and resist water when their surface and edges are properly finished. A ceramic shower corner shelf may use a matching tile surface over a supported insert, or a molded ceramic piece with a finished rim. Inspect glazed edges for chips and avoid designs with deep recesses that trap soap.
Stone shelves look substantial and provide a broad, rigid surface. Granite and quartz generally tolerate daily moisture well. Marble and other porous stones may stain or etch, especially under shampoo residue, so sealing and regular wiping matter.
Metal shelves are thin, light, and easy to clean when made from stainless steel or another corrosion-resistant finish. Check seams, welds, and mounting points for places where residue can collect. Glass shelves keep the corner visually open, but exposed edges need polishing or protective treatment, and bottles can slide unless the surface includes a raised lip.
Bonded shelves made from solid surface, acrylic, or composite materials offer low-maintenance surfaces and simple retrofit installation. Their performance depends more on the bonding surface and edge design than on the material name. Avoid any shelf with a soft, unsealed core at an exposed cut edge.
Choose projection for bottles, elbows, and cleaning access
For many showers, an 8- to 10-inch projection from each corner wall provides useful bottle space without making the enclosure feel crowded. Measure the actual corner and the products you use rather than relying on a nominal size. A large pump bottle may need 10 to 12 inches of clear depth, while small toiletries need much less.
Keep the front edge clear of the user’s shoulder and elbow path. In a narrow enclosure, a smaller shelf placed higher may be safer than a deep shelf at chest level. Leave enough space below the shelf for a hand or sponge to reach the wall and corner. Rounded or eased edges are more comfortable and collect less residue than sharp projections.
Place a tile corner shower shelf for reach and elbow room
Set height from user reach and bottle height
Measure from the finished shower floor, not the unfinished subfloor. A common starting point is a shelf surface about 42 to 54 inches above the floor, adjusted for the users and the enclosure. The lower end suits children or seated users; the higher end can keep products away from a busy elbow zone.
Stand in the shower and mark the shelf location with painter’s tape. The user should reach the back corner without leaning under the shower stream or twisting. Place the tallest bottle on the proposed surface and allow at least 2 inches of clearance above its cap or pump. If you install two shelves, leave roughly 12 to 16 inches between surfaces, then verify the real bottle heights.
Do not position a shelf where it blocks a handheld shower, interferes with a shower door, or sits directly under a strong spray. A shelf outside the main stream stays cleaner, but it must still drain freely after incidental splashing.
Align grout joints without shrinking usable shelf space
Set the shelf layout before the wall tile is cut. Aligning the shelf with a horizontal grout joint usually gives the installation a deliberate appearance and can simplify cuts. However, forcing the shelf to match a joint may reduce its usable depth or leave an awkward sliver of tile.
Prioritize support, bottle clearance, and a clean edge over perfect visual alignment. Keep grout joints consistent with the surrounding tile where possible. Calculate the finished shelf dimensions after accounting for tile thickness, thinset, edge trim, and grout. A shelf that looks large before installation may lose an inch of usable space after those layers are added.
Ceramic shower corner shelf: tile joints, slope, and drainage
Protect waterproofing continuity at every interface
The waterproofing membrane must remain continuous behind the tile and around any built-in shelf assembly. Use a compatible bonding and sealing system at corners, penetrations, and changes in plane. Do not rely on grout to stop water, and do not cut the membrane casually to fit a shelf.
For a retrofit shelf, identify the wall construction before drilling. If fasteners must penetrate the wet area, seal the holes with the system specified for that substrate and installation. Adhesive models reduce penetrations, but they still depend on a sound tile surface and a sealed, stable shelf assembly.
Slope the surface, finish edges, and leave drainage paths
Slope the shelf slightly toward the shower, commonly about 1/8 inch per foot. The slope should be enough to move water off the front edge without making bottles unstable. Check it with a small level before the thinset or adhesive cures.
Finish exposed tile edges with a trim profile, bullnose piece, or carefully polished edge. Use flexible sealant at changes of plane, including the shelf-to-wall junction, rather than treating those movements as ordinary grout joints. Keep the front edge open enough for water to escape; do not create a raised back lip or sealant dam that traps runoff.
Keep corners and hardware easy to clean
Choose a shelf with shallow corners, accessible underside surfaces, and few unnecessary seams. Tool grout and sealant neatly so there are no ledges for soap film to collect. Wipe the shelf regularly, rinse away shampoo residue, and use a cleaner compatible with the tile, stone, metal, or glass finish. A smooth, sloped surface with sealed joints will stay cleaner than a deeper shelf with rough edges and enclosed pockets.